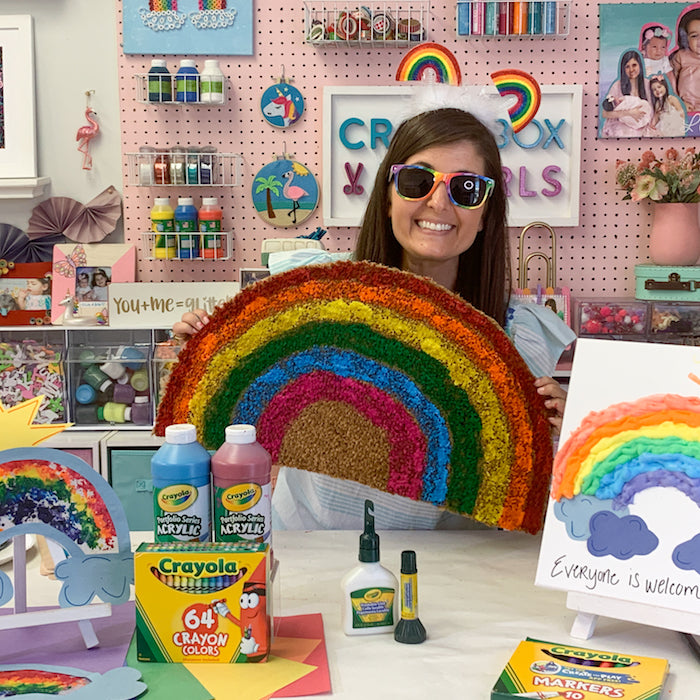
Kicking off Summer and celebrating pride with 3 rainbow crafts! It is a month of fun and to remember that love is love and everyone is welcome under our rainbow! This week on my Crayola facebook broadcast I sharpening some crayons to create a colorful rainbow sun catcher, turning a boring door mat into a welcoming rainbow and mixing up some puffy paint for a 3D painting!
All the Crayola products I used this week can be purchased on crayola.com

Project 1: Crayon Melt Rainbow
Materials:
- Crayola Crayons
- Crayola Construction Paper
- Wax Paper
- Iron or Blow Dryer
- Crayon or Pencil Sharpener
- Washable Glue
- Scissors
- Rainbow Template
Directions:
- Remove the paper from outside of the crayons. You can use new or broken crayons.
- Pick out the colors of the rainbow and sharpen each color and keep the shavings in separate piles. You can use the traditional colors you get creative and create your own mix.
- Download, print and cut out the rainbow template on a piece of construction.
- Place the template on a heat safe surface. Take a piece of wax paper that is 2x the size of the template and place it over the template. Align it so you could fold up the bottom half.
- Sprinkle the crayon shavings into the middle opening of the rainbow. You will be able to see the outline through the wax paper. Fill it with all the colors. You can leave some space between the shavings.

- Fold up the bottom half of the wax paper being careful not to shift the crayon shavings.
- Slide the construction paper rainbow out from under the wax paper.

- It's time to melt the crayons. If you are going to use a blow dryer tape the wax paper to the table so it does not move from the air of the blow dryer. No need to tape if you are going to use an iron.
- Apply the heat until you see the shavings begin to melt.
- Once they are melted let the wax paper cool before handling it.

- Trim the wax paper to fit into the rainbow cutout. You want to leave enough space to glue it to the back.
- Use washable liquid glue to glue the wax paper to the rainbow cutout.
- If you want to add extra fun you can cut out and add a sun to the rainbow.

Glue a piece of yarn if you want to hang it! You can also tape it to the window to watch the sun rays reflect through it!
Project 2: Rainbow Door Mat
Materials:
- Crayola Acrylic Paint
- Foam Brushes
- Place Brown Door Mat
- Sharp Scissors (Adult Use)
Directions:
- If you want to cut out the shape of the a rainbow you will need a sharp scissor. You will either want to draw the shape with a permanent marker or trace a large circular item. This is an adult job.
- Use the acrylic paint to paint the bands of the rainbow. Apply the paint with the foam brush by dabbing up and down.
- Let the mat dry overnight.

Did you catch the sun doormat we made a few weeks ago?

Project 3: Puffy Paint Rainbow
Materials:
- Crayola Washable Glue
- Shaving Cream
- Washable or Tempera Paint
- Craft Sticks
- Canvas
- Crayola Construction Paper
- Crayola Washable Markers
- Crayola Glue Stick
- Paint Brushes
- Crayola Take Note Permanent Marker
- Mix 1:2 part ratio of washable glue (1) to shaving cream (2) in a bowl. 1/2 cup to 1/4 cup was plenty for this project. Make sure you are using traditional foaming shaving cream. It doesn't matter if it has a color tint. I used a pink tinted one and it works great.
- Separate it into enough cups for each color of the rainbow. If you plan to do ROY G BIV you will need 7 cups. I did 6 cups.
- Using a craft stick, dip in the paint and mix into each cup. Use a separate stick for each color of paint. Mix until the whole mixture is colored.
- Cut out clouds from blue construction paper and use the glue to adhere to them to the canvas on each side. The clouds will be the end of the rainbow.
- Using a paintbrush and start with either the violet or the red and dab the mixture on in an arc shape from one cloud to the other. You can paint it first and then come back and dab the mixture over it so that is 3D.
- Continue until you do all the bands of the rainbow.
- You can also add a construction paper sun and write a message with a permanent marker.
