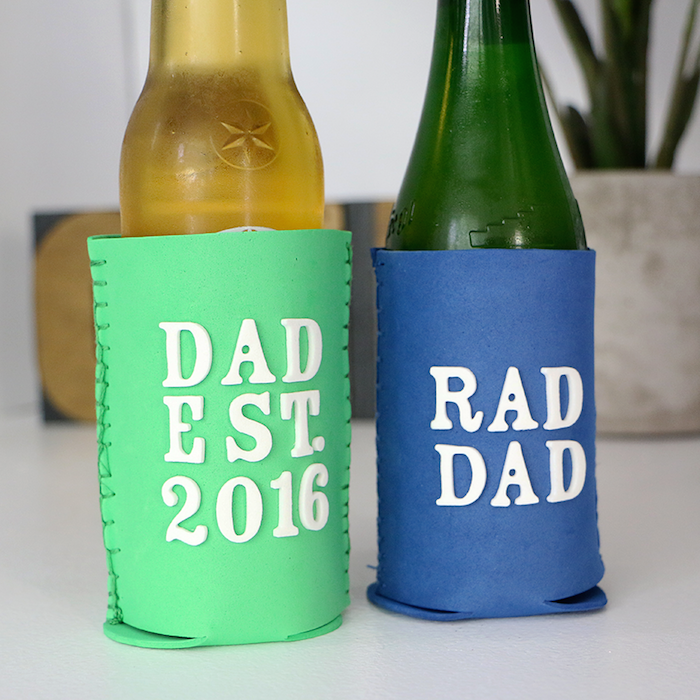
When Father’s Day rolls around most of us panic. Why is that dads are so incredibly hard to buy gifts for? Finding a unique and thoughtful gift can be difficult, but also making sure it’s something he can/will use just adds to the stress. Have no fear; this DIY custom father’s day koozie is the perfect gift for dad this year! This Father’s Day koozie is really easy to make. Foam sheets come in various colors allowing you to pick your dad’s favorite color. You can also customize the saying for your dad’s koozie. There are so many fun saying to choose from like “Rad Dad” and “Dad Est. XXXX” adding the year he became a dad. You could also go with a classic like “#1 Dad” or “Best Dad Ever”. There really are so many options since this koozie is 100% customizable. Check out the full tutorial below to see how you can make a DIY custom Father’s Day koozie for your dear old dad this year!
Supplies:
- Blue Foam Sheet
- Beacon Foam Glue
- Thickers White Stickers
- Matching Embroidery Floss
- Embroidery Needle
- Scissors
- Pencil
- Flat Koozie (to use as a template)
Directions:
- Fold your foam sheet over so it’s the same height as your koozie. Lay your koozie on your foam so the bottom is on the fold. Then, align the side of the koozie with the edge of the foam and trace around it.


- While holding your foam together with your hand (or by using clips), begin cutting around the lines you traced.


- Cut a piece of floss that is double the length of your koozie. Next, thread your needle and tie a double knot at the end.


- To stitch the koozie together, you are going to use a backstitch (if needed, you can do a quick search for more in-depth instructions on how to do this type of stitch). First, push your needle through just one of the foam sides, pulling it through so the knot is on the inside.

- Go back and push your needle through the same hole again, but this time push it through both pieces of foam.

- As you pull your thread through the foam, leave about a ¼ inch of loose string. Then, run your needle under the string and pull it tight. To create another stitch, push your needle through both pieces of foam again about 1/8 of inch away from your last stitch. Once again, leave the string loose at the end so you can run your needle through it. Then, pull the string tight again. Continue the backstitch until you have stitched the entire side of the koozie.


- When you get to the end, push your needle so it is in the inside of your koozie. Pull the needle off and separate the strings. Then, tie two knots and trim the ends. You’ll repeat the backstitch (steps 4-7) on the other side of the koozie.

- Once your koozie has been stitched, decide on a saying. Add your stickers to the koozie, making sure the letters are centered and spaced to your liking.

- After you arrange your letters, add a little of bit of adhesive to the back and glue them to your koozie. This will help keep the letters on the koozie over time.


You are now left with a DIY Custom Father’s Day Koozie that is one-of-a-kind. All you need to do is grab some of your dad’s favorite beverages and you are all set for Father’s Day.


This is one gift your dad can use over and over again. Did I also mention that’s it folds down so it’s easy to store!
- Meghan Quinones
Meghan Quinones is a Craft Box Girls contributor as well as a blogger, content creator and author of her blog Happiness is Creating!