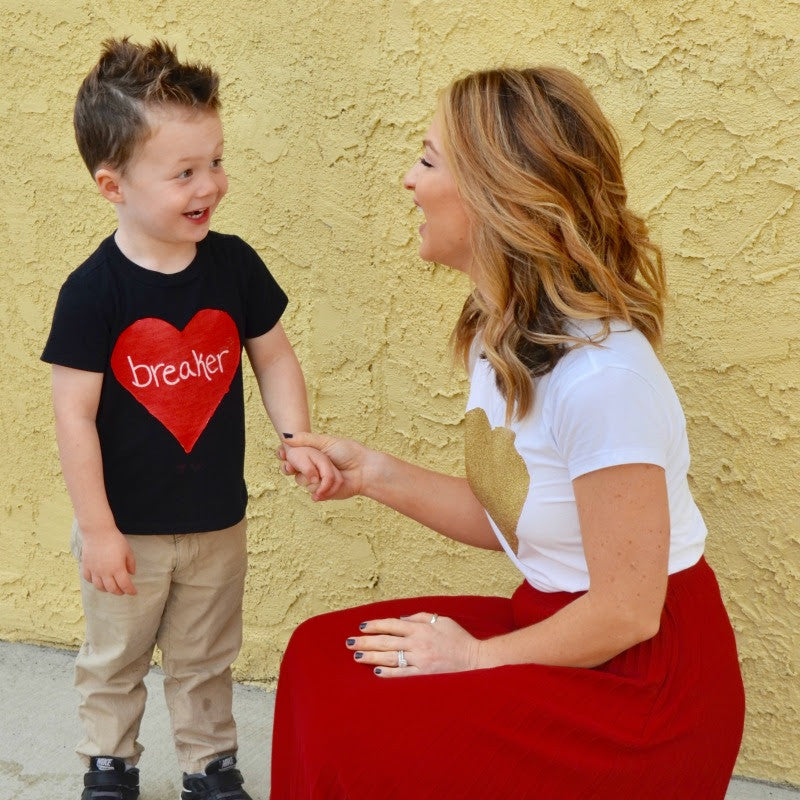
I love Valentine’s Day, because it gives me an excuse to wear lots of girlie colors and as many hearts as possible. This year, instead of going to the store to buy something that everyone else will be wearing, I thought that it would be fun to make DIY painted clothes for myself and my son to wear on Valentine’s Day.
I thought that a glittered heart shirt and pants covered in hearts would be fun for me to wear, and a “heartbreaker” shirt for my son would be adorable. These are so easy to make! Acrylic craft paint is perfect for this craft, because it will stay on your clothes really well, but that also means that you need to be extra careful when you start the DIY project. If you make a mistake, it could be hard to fix. I highly recommend using chalk to draw your design first, then follow up with the paint of your choice.
Another great trick to create a perfect heart shape is to use label paper. This allows you to make a perfectly symmetrical heart shape by folding the paper in half. Then, when you stick the label paper on, you will have very clean lines. It’s like using painter’s tape.
If you want to make your shirt glittery, then the trick to making a shirt that doesn’t get glitter everywhere is Mod Podge! The Mod Podge can be used to attach the glitter, and to secure it! So, once the glitter is dry, shake the excess glitter off. Then add a thin layer of Mod Podge over the dried glitter to set the glitter in place! That means it won’t come off the shirt at all.

DIY Painted Clothes for Valentine’s Day
Acrylic Craft Paint
Paint Brush
Full Page Label Paper
Pen or Pencil
Scissors
Glitter
Mod Podge
Paint Pen; optional
Chalk; optional
Glittered Heart Shirt
1.Place a magazine, or something similar, between the shirt so that the paint won’t go through to the back of the shirt.
2 Fold the large label sheet in half and draw half a heart on the fold; whatever size you desire.
3. Cut the heart out.
4. Take the back off of the label off and attach the sticky part to the shirt where you want the heart to be.
5. Carefully paint the heart any color you like.
6. Allow to dry completely.
7. If you want to add glitter to the heart, start by applying a thin layer of Mod Podge over the painted heart.
8. Generously pour the glitter on the heart shape.
9. Allow to dry completely before shaking off excess glitter.
10. Carefully remove the heart shaped label.
11. To secure the glitter onto the shirt, apply another layer of Mod Podge over the dried glitter. Allow to dry completely


Heart Breaker Kid’s Valentine’s Day Shirt
1. Place a magazine, or something similar, between the shirt so that the paint won’t bleed through to the back of the shirt.
2. Fold the large label sheet in half and draw half a heart on the fold; whatever size you desire.
3. Cut the heart out.
4.Take the back off of the label off and attach the sticky part to the shirt where you want the heart to be.
5. Carefully paint the heart any color you like.
6. Allow to dry completely, then remove the heart shaped label.
7. Use a piece of chalk to write “breaker” on the painted heart shape.
8. Use the paint pen to write “breaker,” or anything you like! The paint marker most likely will not show up on fabric, so you need to write on the painted heart.


Heart Painted Pants
1. Place a magazine, or something similar, in the middle of the legs of the pants so that the paint won’t go through to the back of the pants.
2. Freehand small hearts with acrylic craft paint using a small paint brush.


Share with us your creation by tagging @craftboxgirls on social media.
For more great crafts and recipes, visit From Scratch with Maria. Follow me on Facebook, Instagram, Twitter and YouTube.
-Maria


