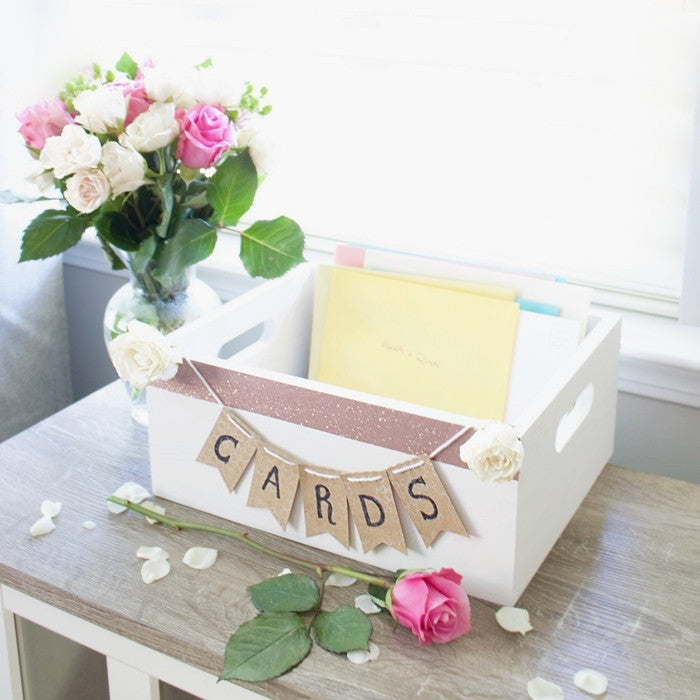
One of the best things about getting married is reading all the kind words and well wishes from friends and family members! This wedding card holder doubles as decorative holder for cards during your wedding and can also serve as a memory box to keep your favorite moments from that special day!

What You’ll Need:
- Waverly Chalk Paint in Ivory
- Waverly Rose Gold Metallic and Glitter Paint
- Waverly Base Coating Brush
- Stencil Tape
- Small Banner with cord
- Sharpie
- Handmade Modern Crate (available at Target and only $7!)
- Paper Towels
We hope you enjoy our convenient shoppable materials list. Just so you know, Craft Box Girls may collect a share of the sales from the links on this page.
Step 1: Depending on the look you’re going for, you may want to sand your wood surface. I love to see a little wood grain through the box so I chose not to sand it.
Step 2: Load your base coating brush with ivory chalk paint and apply one layer to the crate. If you want this to be true opaque white, apply a second coat after the first coat dries completely.

Step 3: Next, tape off an area at the top of the box where you want the rose gold to go. This particular box has little notches on the sides so it’s easy to mark and create a straight line with the tape.
Step 4: First, apply the metallic rose gold to the taped off area at the top of the box and let dry.

Step 5: Then, apply the rose gold glitter to the same area on top of the metallic. This will help create a rich glitter surface that’s very opaque. Immediately remove the tape and let dry.
TIP: You can apply the glitter straight to the ivory surface if you’re ok with the white showing through a bit but I wanted it to be really rose gold with no white showing through which is why I applied the metallic first and then the glitter over it.
Also, I have to say that this is my FAVORITE glitter paint. The color is so pretty and the glitter pigments are larger than other glitter finishes which gives you maximum shine :-)

Step 6: While your paint is drying, you can label your banner with a Sharpie. I chose to use a plain black sharpie so it would show up better on my little banner but you can choose whatever color you’d like. Write “CARDS” on the banner and let it dry.

Step 7: Assemble the banner to the crate with a push pin or tape the string to the inside of the box to hold in place.
Voila! Your card box is ready to go! You can also further embellish with fresh flowers for a more romantic look like shown below!


I hope you enjoyed learning how to make a custom Wedding Card Box for your special day! Feel free to share with anyone who needs DIY Wedding inspiration!
Want more inspiration that speaks to you? Visit my personal blog at www.madesoulful.com and follow me on my social channels @madesoulful!
Much love,
Anna