Summer is here and if you have been following my project posts you know I have been ingrained in sprucing up my outdoor spaces with simple and creative projects. I am thrilled to team up with Krylon to celebrate Summer in a very colorful fashion. Throughout the year I will be sharing my favorite colorful outdoor do it yourself projects made easy with my favorite Krylon products I promise they will be simple, creative, useful and fun to make!
Materials:
- Wooden Garden Lattice (Available at your local hardware store for under $20)
- 2 Cans of Krylon Chalky Finish in Wheat
- 2 Cans of Krylon Chalky Finish in Scarlett
- Plastic Plant Pots
- Cup Hooks (They have a hook on one end and screw on the other)
- Drill
- Washi Tape (optional)
- Garden Flowers/Potting Soil
- Tarp or Drop Cloth

Directions:
- Prep your spray painting area. It is important to spray outside or in a well ventilated area. Cover a large surface with a tarp or drop cloth.
- I love using Krylon products because you don't have to prime the surface and you can use most of their products on multiple surfaces including wood, plastic, metal, glass, ceramic and wicker. The lattice I purchased was a dark wood and I was a little worried about coverage. My lattice is 72 inches x 24 inches and I only need 2 cans of the Krylon Chalky Finish in Wheat to achieve full coverage and get a great rich color. It took about 3 coats to achieve a rich yellow color. Let each coat dry for 20 minutes in between spraying. Make sure to spray about 12 inches from the lattice and use a sweeping motions to evenly distribute the paint.
- In between coats of paint on the lattice, move at least 20 feet away from lattice and use your drill to drill a single hole about 3/4 of an inch from the top rim. This hole is how the pot will securely hang from the lattice. It is important to move far away from the lattice to avoid dust from the drilling does not settle on your lattice while it is drying.

- Place the pots upside down on the tarp. Spray the pots with 2 coats of the Krylon Chalky Finish in Scarlett, letting it dry for about 20-25 minutes in between coats.
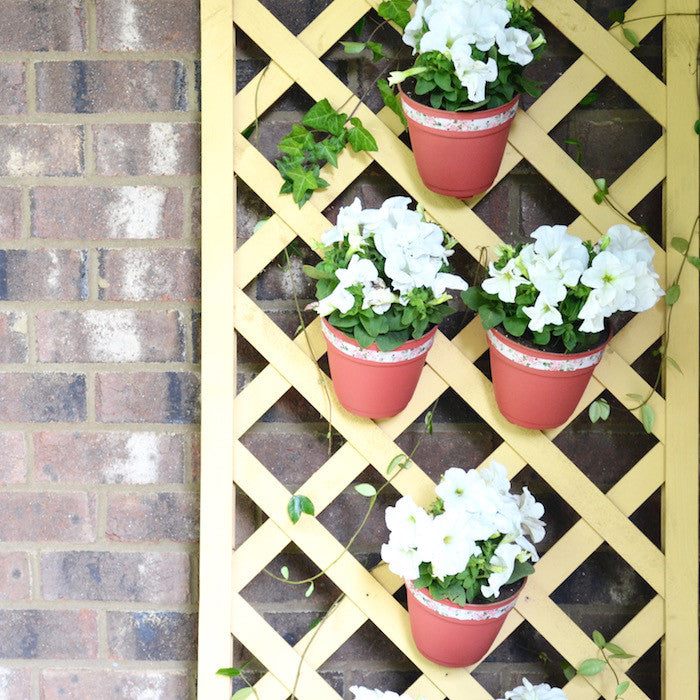
- After the lattice is completed and dry, determine the placement of the pots on the lattice. Once you have determined the placement take a cup hook and manually screw it into the point on the lattice in which you want the pot to hang. The hooks are made to easily screw into the wood without using a drill. Make sure to tighten the screws ending with the opening of the screw facing upward.

- Once the pots are dry, you can add decoration using washi tape. I wanted to add a little more color to each pot so I secured a washi tape around the top rim. I used a few drops of glue to secure the ends so weather changes would not cause the tape to peel.
- Next hook each pot onto the cup hook by pushing it through the hole you created with the drill.

- Next add the flowers or plants with potting soil to the pots. Make sure to break up the roots and add in plenty of potting soil.
- When I was done I made a last minute decision to add some ivy to my lattice.
- I love this piece because you can display it anywhere. I currently have mine on my front porch and I am in the process of making another one for my deck.


I used the Krylon Chalky Finish in Wheat and Scarlett but there is an assortment of colors available. You can find this product at your local Michaels store or you can check out Krylon's website to find a retailer near you.
Connect with Krylon: Website | Facebook | YouTube | Pinterest | Twitter
xoxo- LL
This post was a sponsored collaboration with Krylon but all project ideas and opinions are my own!