Handmade gifts are the trend for holiday gift giving this year and I am all about creating one of a kind gifts for my friends and family this year. I am excited to continue my partnership with Aleene's to share more handmade gifts that you can easily make at home.
A few weeks ago I tried Aleene's Tack It Over & Over and Aleene's Stick & Re-Stick for the first time. If you missed my Fall Glitter Tumbler Tutorial you can check it out HERE. Both products are a go-to for creating glitter crafts. Today I am sharing a metal glitter sign tutorial and a glitter tumbler using both of these magic projects!
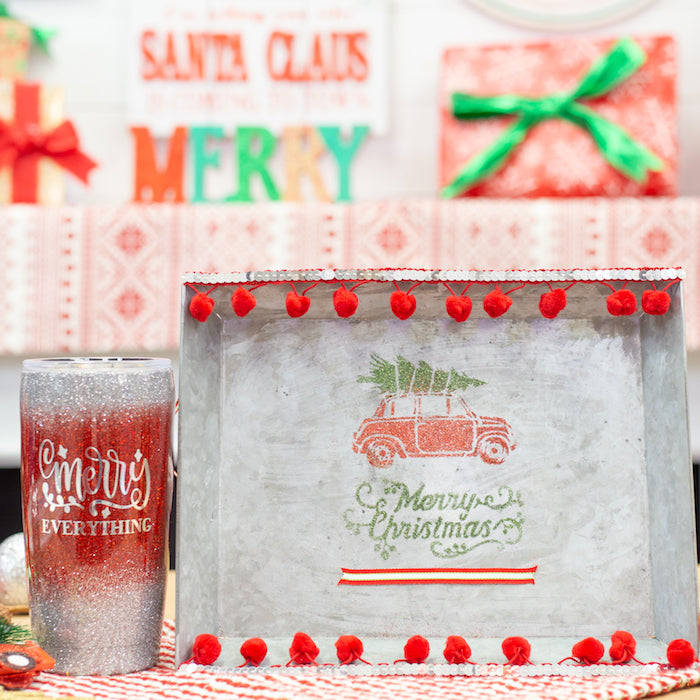
Project 1: Metal Glitter Sign
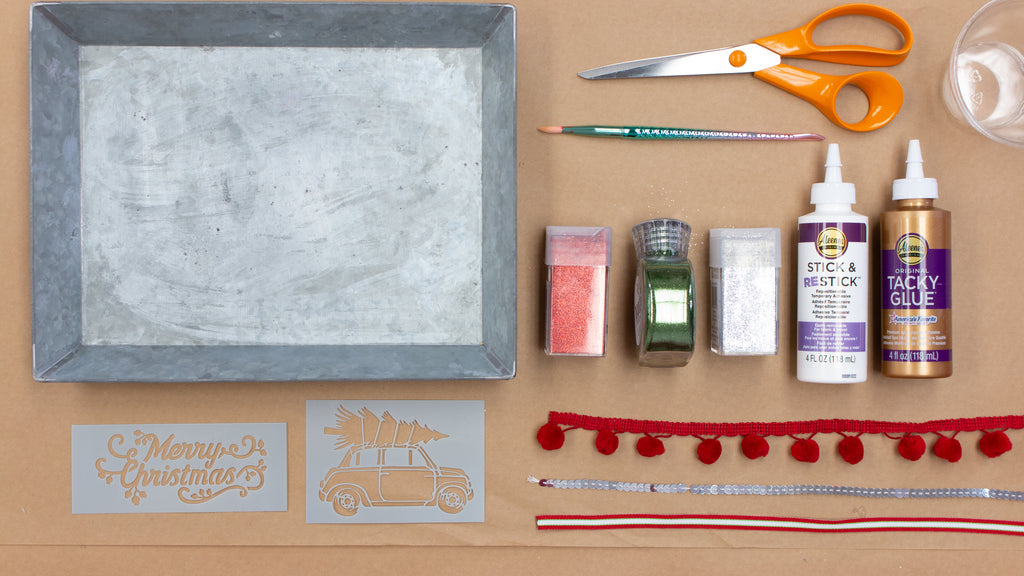
Materials:
- Aleene's Stick & Re-Stick
- Aleene's Tacky Glue
- Galvanized Metal Tray or Flat Sign
- Adhesive Holiday Stencils
- Fine Glitter
- Trim and Glitter
- Ribbon
- Craft Stick and Cup for Mixing
- Water
- Paint Brush
Directions:
- Mix equal parts of Aleene's Stick & Re-Stick with Water. Mix thoroughly with the craft stick.
- Apply the stencils to the tray.
- Paint the mixture over the stencil.

- Sprinkle the glitter over the stencil.

- Pull up the stencils to reveal the perfect design left in glitter.
- Shake off excess glitter.
- Use the Aleene's Tacky Glue to apple the pom pom trim and sequins to the top and bottom edge.

- Cut small pieces of ribbon and glue it below the stencil.
- Cut and glue a piece of ribbon to the back of the tray to create a hanger.

TADA! The perfect sparkly gift for someone special!
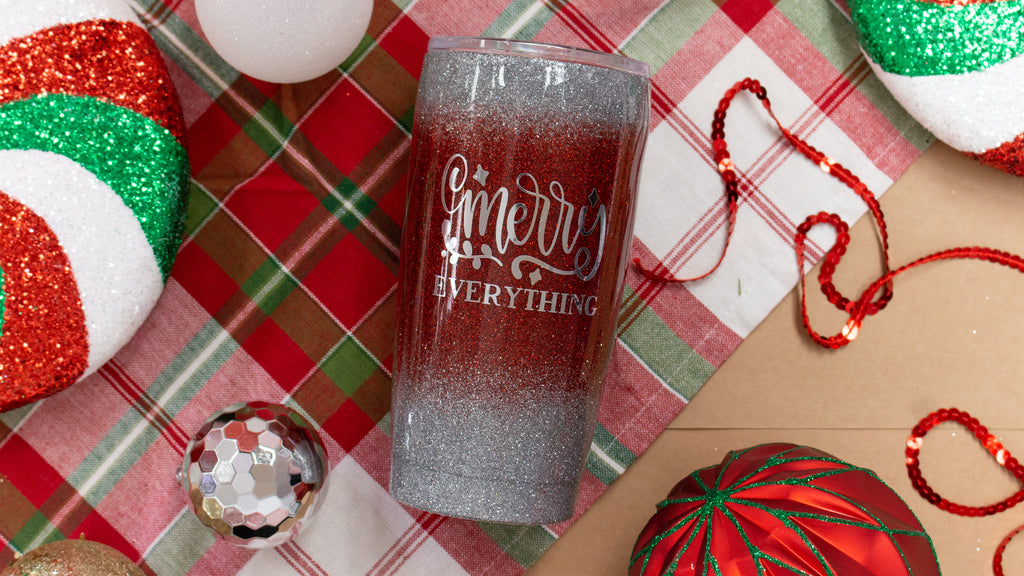
Project 2: Holiday Glitter Tumbler

Materials:
- Aleene's Tack It Over & Over
- Tumbler
- Spray Paint Primer
- Fine Glitter
- Epoxy
- Tumbler Spinner
- Gloves
- Mask (for applying epoxy)
- Adhesive Sticker (optional)
- Cups and Popsicle Sticks for Mixing
- Fine Brush

Directions:
- Outdoors or in a well ventilated room spray paint the tumbler. Make sure to tape the inside and top of the tumbler to avoid anything getting in the cup. Let it completely dry.
- Place the tumbler on the spinner.
- Mix a 1:1 ratio of Aleene's Tack It Over & Over and Water. Throughly mix with a popsicle stick.
- Turn on the tumbler spinner.
- Paint the mixture all over the tumbler and let it dry. Once it dries it will be tacky.

- Sprinkle an even coat of glitter all over the tumbler.


- Next, use your fingers to rub off the top layer of glitter. The glitter will be pushed flat into the cup leaving you with a smooth glittery surface.

- Next mix epoxy according to the package. Follow safety instructions and wear a mask.
- Keep the tumbler spinner, spinning and pour on an even coat of epoxy. It will self level. Make sure you covered the entire tumbler including the bottom.

- If you notice bubbles and the epoxy looks a little uneven glide a heat source like an open flame or heat gun a few inches from the tumbler while it spins for a few seconds at a time.
- Let the tumbler spin for 6-8 hours and then cure overnight until the epoxy is completely hard.
- If you plan to apply a vinyl decal do so once the epoxy is cured. If you are using permanent vinyl you do not need to apply a top coat of epoxy. If you are using removable vinyl you will need to apply another layer of epoxy and let it spin for another 8 hours until cured.

TADA!! Another sparkly handmade gift ready for someone special!

Make sure to check out Aleene's website, facebook and instagram for more creative projects!
Stay tuned I have so many more holiday projects coming your way with Aleene's Adhesives!
xoxo- Lynn
This post is sponsored by Aleene's but all thoughts and opinions are my own!
If you loved the project feel free to pin-it!
