Even your pencils can get dressed up for Halloween. Today we are making 3 Model Magic Pencil Toppers.
A few reminders before getting started. Have a zip top bag or airtight container ready to store your extra model magic so you can make projects later.
Have a cup handy so you can keep your pencil toppers up right until they are completely air dry. They will dry in anywhere from 4-24 hours depending on your climate.
Project: 3 Model Magic Pencil Toppers
Difficulty: Easy
Materials From Kit:
- Model Magic
Additional Materials:
- Pencils
- Scissors

Project Video:
Click HERE to watch the video on Youtube with captions.
Directions:
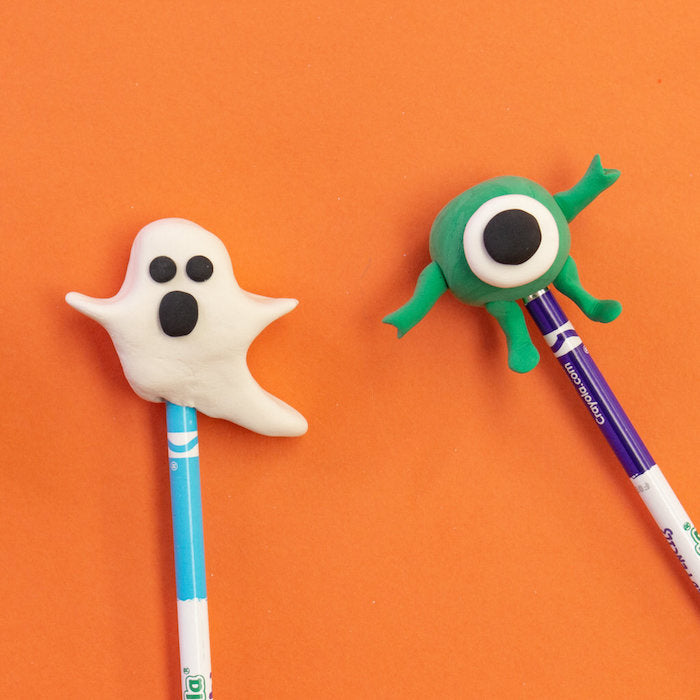
First we are going to make a ghost!
- Take a large piece of white about the size of 2 quarters and small pinch of black about the size nickel.

- Roll the white into a ball.

- Slightly press the ball between your fingers to flatten it.
- Use your index finger and thumb to pinch out the sides and make the ghost arms.


- Use your fingers to form a head for the ghost.

- Pinch out the tail of the ghost. Push the ghost onto the top of the pencil. You might need to reshape it after it is on the pencil.

- Pinch off a tiny piece of black and roll into balls for the eyes and a wide mouth. Press them onto the ghost.

Witch Hat
- Pinch off a chunk of black about the size of 2 quarters. Pinch off small pieces of yellow and red.

- Roll the black into a ball.

- Use your fingers to mold the ball into a cone. Pinch out the edges to make the brim of the witch hat.

- Push the hat on a pencil. You might need to reshape it after it is on the pencil.

- Roll the red into a snake and wrap it around the hat.

- Roll the yellow into a ball and press between your fingers until it is flat.
- Use the scissor to cut out a bat. Make small eyes out of extra black or draw on with a marker. Press the bat to the front of the hat.

Monster
- Pull off a chunk of green about the size of 2 quarters, and two small chunks of white and black.

- Pull off half of the green and roll it into a ball.

- Push the ball onto the pencil. You might need to reshape it after it is on the pencil.

- Roll a small ball of white and press between your thumb and index finger to make an eye. Press on the front of the ball.


- Roll a smaller ball of black, press between your fingers and press in the center of the white eye. You have a big monster eye.

- With the extra green, mold arms and legs for the monster. Press them onto the monster.

Don't forget to keep the pencil toppers right side up until they are dry. You can store them in a cup. Don't them touch each other until they are dry. Also store your extra model magic in a zip top or air tight container!

I can't wait to see your pencil toppers! Parents, if you are apart of the facebook group please share your child's project so I can see their creativity!