If you have children that are excited as you are about Christmas then a DIY advent calendar is the perfect project to count down to the big day. An advent calendar has 24 envelopes for 24 days until Christmas. I like the even 25 days and that extra 25th day is a bonus. An envelope is to be opened each day and contains small surprises like a picture, message or chocolates.This is great for kids to anticipate and enjoy the little surprises until Christmas Day. How sweet is that?
To make your own advent calendar, gather these supplies and let's get started:
- 1 holiday card stock sheets
- Scissors
- Glue
- Strings
- 25 mini clothes pins
- 1 white chalk marker.
Directions
- Cut each cardstock to 4.5 " X 8". Cut to make 25 cards.
- Fold each card in a tri-fold and use glue to seal the bottom and right side. (See picture diagram.)
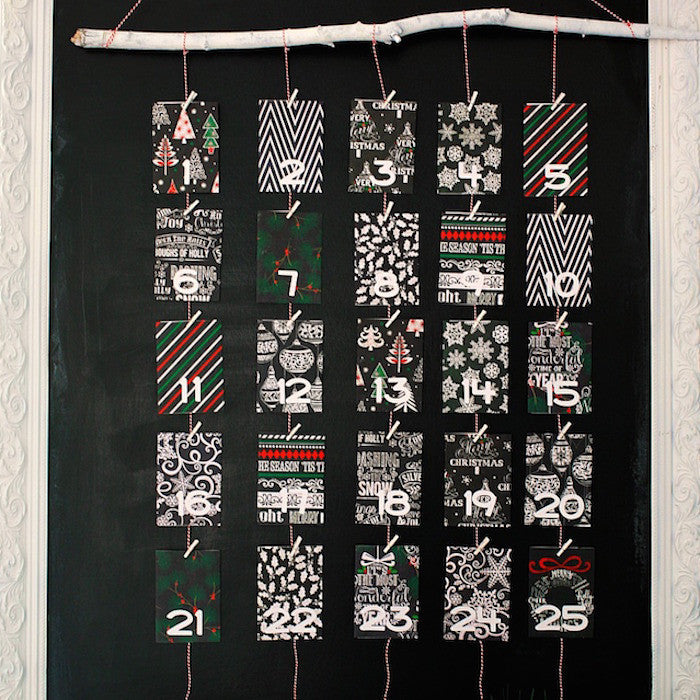
- On the clean surface of the envelope, draw the number for the days from 1 to 25 on each envelope.
- Use the mini clothes pins to clip the envelopes to the strings.
- Hang the strings on a tree branch. (I got my branch from my backyard and spray painted it white for a winter look.)
- Fill each envelope with either a picture, message, or chocolates. Be creative and have fun with it.
Check out more fun DIY projects and recipes on my blog, Sweets by Chan!
Enjoy
Chan

Hi. I have been making lots of these flowers but i am struggling to find some thing to hang them on I have purchased a wedding arch. Also i have a trifold room d. Room divider but it would need to be stablizec. Any suggestions????