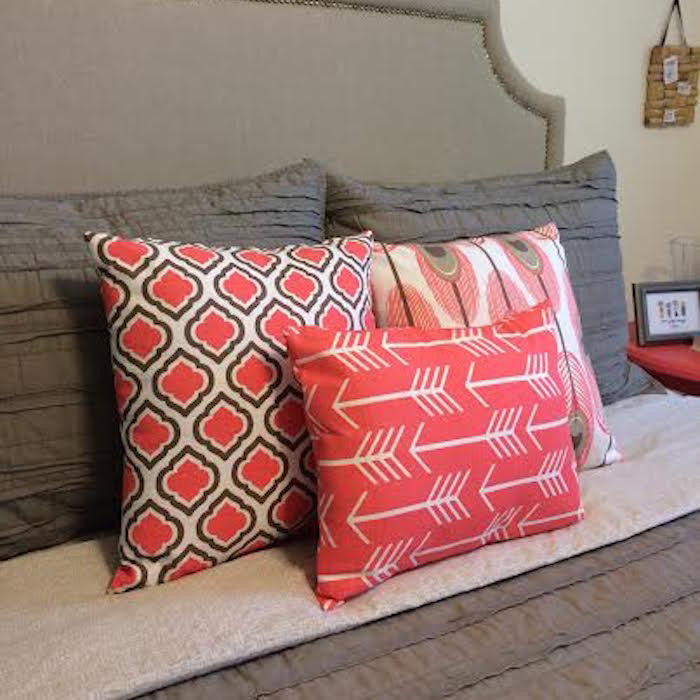
In honor of National Sewing Day, it’s only natural that I would want to share an easy sewing DIY project with you! When I moved into my new apartment, I wanted to add some color to my bedroom with accent pillows and those can get pricey. I was walking into stores and walking right out. So I decided to make my own and I’m so happy I did! I love the way they came out and it saved me a fortune! And because it’s so cost effective, you can pretty much make new pillow covers any time you want!
This is what you’ll need:
- Sewing machine
- Thread
- Scissors
- Seam ripper
- Ruler
- Pen/pencil
- Fabric (1 yard)
- Zipper
- Pillow insert (available at most craft stores)

Step 1:
Iron out fabric and fold in half, right sides together. To maximize the usage of your fabric, don’t cut the square in the center of the fabric – start towards the edges. Add one inch seam allowance and draw your square. My pillow was 12x16” so I cut two squares that were 13x17”. With the right sides together, you are going to pin along one side of the edge. Mark two inches from the top and two inches from the bottom. The first two inches, you will sew at a 2.5 or 3 stitch. Once you hit the two inch mark, change your stitch size to 4 or 5. Then when you get to the bottom two inches, you will adjust the stitch length back to 2.5 or 3.
Step 2:
Iron your seam open and place right side down. Place zipper in the center of the seam with the teeth facing downward. I use scotch tape to hold my zipper in place. I find that it lays flat and it easier to maneuver compared to pins. Mark the two inch marks on the zipper with a pen. You will stitch down your zipper all along the sides and around the marked points. Peel off the tape gently. Turn fabric over and take your seam ripper and gently tear the seam inside the stitching. Once complete, the zipper will be exposed.
Step 3:
Make sure zipper is kept open and pin the remaining three sides down (right sides together) and stitch around the remaining sides. Make sure to backstitch! Trim all three side and clip the corners. Turn right side out and use the tip of the scissors to push out the corners. From there, you can insert the pillow and zip it shut!
Voila! Now go on with your bad self and brag about those pillows you made!
- Laura
- Laura