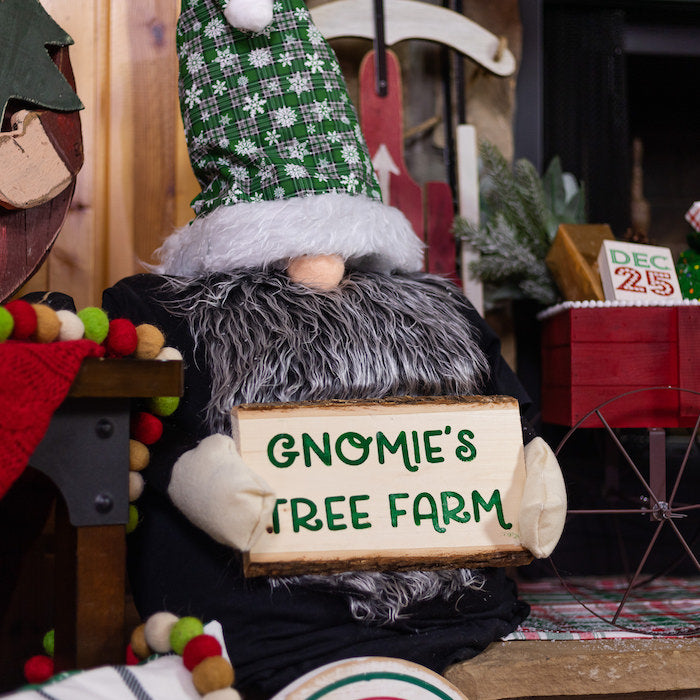
There’s no place like “gnome” for the holidays! Santa’s little helper makes everything fun We partnered with Unicorn SPiT and E6000 to make him in a cinch to make!

Materials:
- Bed Pillow
- Large wood round
- Unicorn SPiT Gel Stain in Dragon’s Belly
- E6000
- Black t-shirt (adult size S)
- Raw wood plank
- Pillow stuffing
- Black felt
- Skin tone felt
- Rubber band
- White fake fur
- Gray fake fur
- 2 Christmas print fat quarters
- Large white pom pom
- Stencil
- Stencil brush
- Non-water based clear coat sealer
Directions:
- Turn the pillow vertically and glue the bottom edge of the pillow to the large wooden round using E6000. Allow to dry.

- Place black t-shirt over the pillow.

- Cut 2 pieces of black felt and roll into cylinder shapes to make the arms.

- Draw mitten/hand shape onto skin tone felt (you will need 4 of these to make 2 hands). Cut the hands out. Place 2 hands together and glue along the edges, leaving the bottom open. Allow to dry.

- Once glue is dry, gently turn the hands inside out and fill with pillow stuffing.

- Glue hands to the bottom of the black felt arms.

- Glue gray fake fur to the front of the shirt starting at the neck. Trim fake fur into beard shape if desired.
- Glue arms to the inside of the bottoms of the shirt sleeves. Glue them at an angle so that the gnome can “hold” the sign.

- Cut a small rectangular piece of skin tone felt. Place a small amount of pillow stuffing in the center and then gather the edges of the felt. This will create the nose of the gnome. Use a rubber band to secure the edges of the felt. Glue the nose onto the gnome at the top of the felt. Allow glue to dry.


- To create the hat, cut 2 identical triangles from the fat quarters of fabric. Make sure to make the triangles tall enough so that the gnome’s hat has enough room to bend over.

- Turn the fabric inside out and glue two edges together, leaving the bottom edge open. Allow glue to dry.

- Once the glue is dry, gently turn the fabric right side out. Stuff about halfway up with pillow stuffing.

- Cut 3” strip of white fake fur. Glue to the bottom edge of the hat.

- Place the hat on the gnome. Position it partially over the nose. Make sure that the edge of the hat touches the beard on both sides of the nose. No pillow or neck of the shirt should be showing. Glue hat in place.

- Flip the tip of the hat over and glue white pom pom to the tip.
- To create the sign: use a stencil to paint words onto the raw wood plank. Adhere the stencil to the sign. Paint lettering with Unicorn SPiT in Dragon’s Belly and let dry.

- Remove the stencil then seal the sign with a non-water based clear coat sealer. Allow the sealer to dry.

- Attach the sign to the front of the gnome with E6000. Glue the gnome’s hands into position so that he appears to be holding it. Allow glue to dry.

This little guy will make a big impression on your holiday guests!

Happy Crafting!
Lorrie
This post is sponsored by Eclectic but all thoughts and opinions are my own!