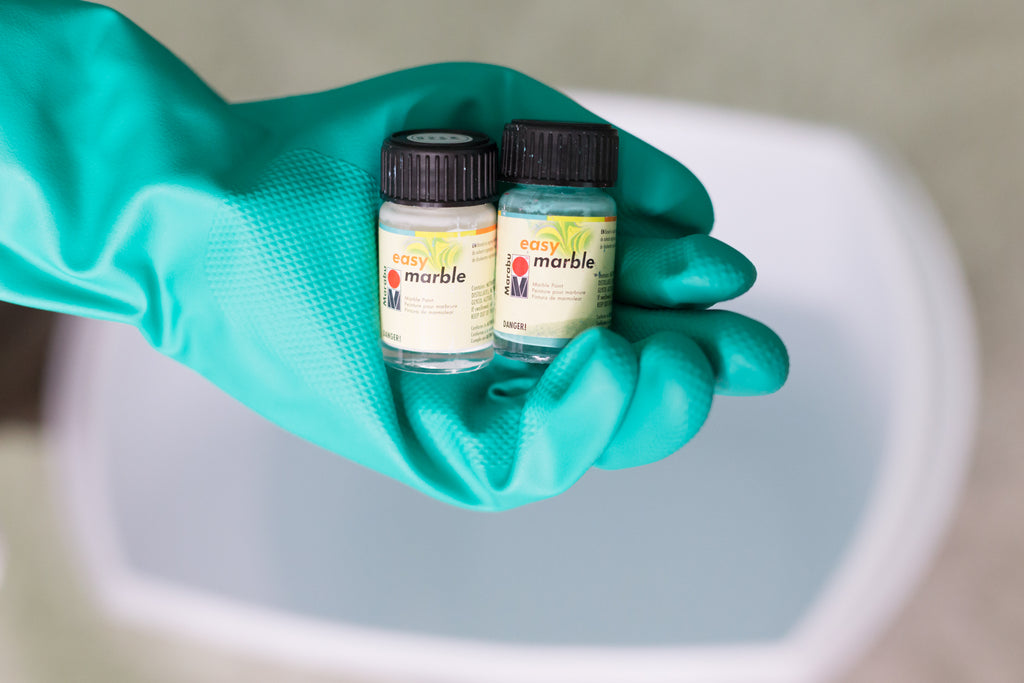
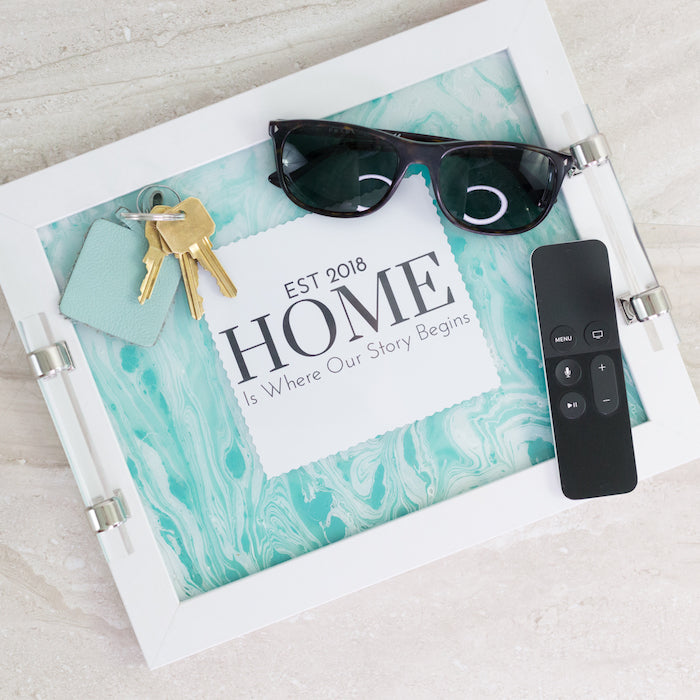
I am always looking for creative ways to add a custom flair to my home and a coffee table tray is a perfect touch for a table or ottoman. Today, I am excited to share a simple DIY Coffee Table Tray that you can make in minutes and will enjoy for all time! This handcrafted tray adds personalized flair to any space and functions as a great tool to keep living room essentials organized. We created a beautiful marble effect using MARABU Easy Marble on the glass. Easy Marble works great on glass, wood, metal, paper, fabric and so many more surfaces.
If you want a full demo on how-to use Easy Marble and see how it works on different surfaces watch Lynn’s Facebook Live.
Materials:
- 1 double-paned picture frame
- 1 white piece of paper of the same size
- MARABU Easy Marble in Aqua Green & White
- 1 skewer or wooden dowel to stir
- Pair of gloves
- Water
- Large, clean empty bin or trash can
- Photo or print of your choice
- Industrial glue
- 2 cabinet handles
Tips
- Protect your floors & clothes during this project
- We used more white than aqua green
- Work quickly adding colors to water, stirring and submerging the glass, the Easy Marble begins to dry as soon as it hits the water
- Make sure the Easy Marble is covering 90% of the water’s surface (no big holes)
Project Time: 30 Minutes
Directions
- Take backing off the double-paned picture frame
- Take out one pane and leave the other in the frame
- Add water to your bin, fill up enough to completely submerge glass
- Pick 2 Easy Marble colors ( we used Aqua Green & White)
- Wearing gloves, shake each bottle before you open them. Add one color at a time onto the surface of the water, be generous.


- Once the surface is completely covered with Easy Marble, lightly stir the colors using your skewer.

- Once you’re done stirring, quickly and carefully grab one glass pane holding it by its top corners and dip entire pane into the water from bottom to top (vertically not horizontally).

- While the glass is in the water, use a paper towel to remove excess ink from the surface to avoid double dip.
- Pull out of the water and hold for a few moments as it begins to dry.

- Carefully find a place to lean marbled glass in an upright position to finish drying (you do not want the wet paint to touch other surfaces).
- When the glass is dry, you are ready to put everything back together in the frame.
- Place photo or print face down onto the clear glass pane in the frame.

- Place the marbled glass on top & then attach frame backing.

- Next flip over and glue cabinet handles to opposite ends of the frame.

TA-DA! And Just like that, you have a beautiful DIY Coffee Table Tray! Check out the DIY Marble Clock video for more fun decor ideas!


This tray is for lightweight items only. Keep in mind the glass is breakable.
Love marbling check out our video to make a Marbled Wall Clock!
Get more inspiration from Marabu: website | instagram | facebook | pinterest | youtube
This post is sponsored by Marabu but all thoughts, opinions and project ideas are my own.


