After Halloween and Thanksgiving, the days seem to whiz by as we ramp up for the holidays. If you follow my posts regularly you know that I have a passion/obsession with decorating my front door and porch. I love the fun it brings to our home and the welcoming vibe it offers to our friends and family. This year my husband and I are gearing up for our big annual holiday party and I am planning my holiday decor super early to avoid the stress of last minute planning (we all know we are guilty at some point). I teamed up with Krylon®Spray Paint to kick off the holiday season with a simple and easy beautiful DIY grapevine wreath. I love wreaths but I have absolutely protested buying them because they are so darn expensive. Making your own wreath at home can save you loads of money! For this wreath I wanted to bring out the festive season with multiple textures and Krylon Spray Paint has a few amazing products that helped me accomplish this goal. I used Krylon Premium Metallic in Silver Foil, Krylon Glitter Blast™ in Cherry Bomb and Krylon Coarse Stone Textured Finish in White Onyx. The entire project only took about 2 hours! Think about fun this could be with a group of friends…. friendsgiving party!

Materials:
- Krylon Premium Metallic in Silver Foil (1 can)
- Krylon Glitter Blast in Cherry Bomb (1 can)
- Krylon Coarse Stone Textured Finish in White Onyx (1 can)
- Scissors
- Hot Glue Gun
- Floral Wire (I used silver to blend in with my color scheme)
- Floral Cutters
- 24 Inch Grapevine Wreath
- Various Faux Leaves
- Floral Picks
- Plastic Crafting Holiday Ornament Balls
- Faux Pine Cones (if you use real ones make sure they are dried)
- Drop Cloth/Plastic Painters Sheet


Directions:
- Outdoors or in a well ventilated room on a covered surface lay out your wreath, leaves, pine cones, floral picks (if you want to alter their color) and your holiday ornament balls. Decide what objects you want to spray paint each color. I suggest doing 2-3 balls in each color, the grapevine wreath in and pine cones in Krylon Coarse Stone Textured Finish.
- Always read the product label for proper application and safety instructions.
- Apply 1-2 coats of Krylon Coarse Stone Textured Finish to the grapevine wreath and pine cones. I went heavy with coats because I wanted a snow like texture.

- Spray additional items with Krylon Premium Metallic and Krylon Glitter Blast. I only needed 1 coat for these items.

- Let items dry for 45 minutes.
- Once all items are dry, it is time to assemble the wreath.
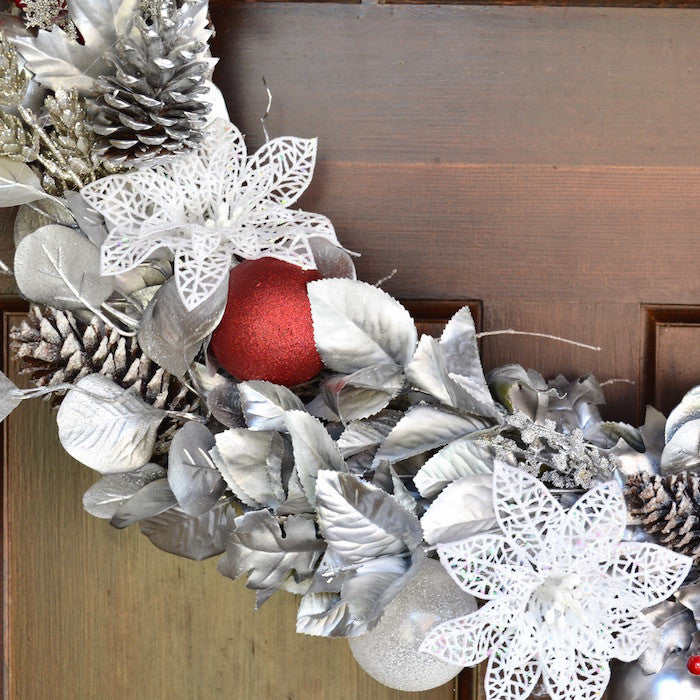
- I went for a segmented design that started at the bottom right curve of the wreath and fanned out to the upper left curve.
- I recommend planning out your design before you start attaching pieces.
- I started with my large groupings of leaves that were still on the stems. I placed each stem facing outward at the bottom left curve of the wreath. This was base for the beginning of the design.
- Next I fanned out to the right and left by adding holiday ornaments, pine cones and floral picks. As I fanned out to the right and left I tried to keep the design balanced.
- For the last step I added in loose metallic leaves to complement the design and fill in the gaps.
- Once the final look is achieved snap a quick picture with your phone so you remember the design in case it gets shifted during attachment.
- Take off the leaves and utilize the floral wire and hot glue gun to attach each object to the wreath.
- The hot glue dries instantly so you can display it immediately!


To purchase these Krylon Spray Paint products and more visit Krylon.com
Connect with Krylon: Website | Facebook | YouTube | Pinterest | Twitter
Happy Holidays!
xoxo -LL
This post is part of a sponsored content campaign with Krylon Spray Paint. All product ideas, pictures and opinions are my own.

