This post is in collaboration with the DIYZ app®. All opinions of apps and companies that help me complete DIY Projects are my own.
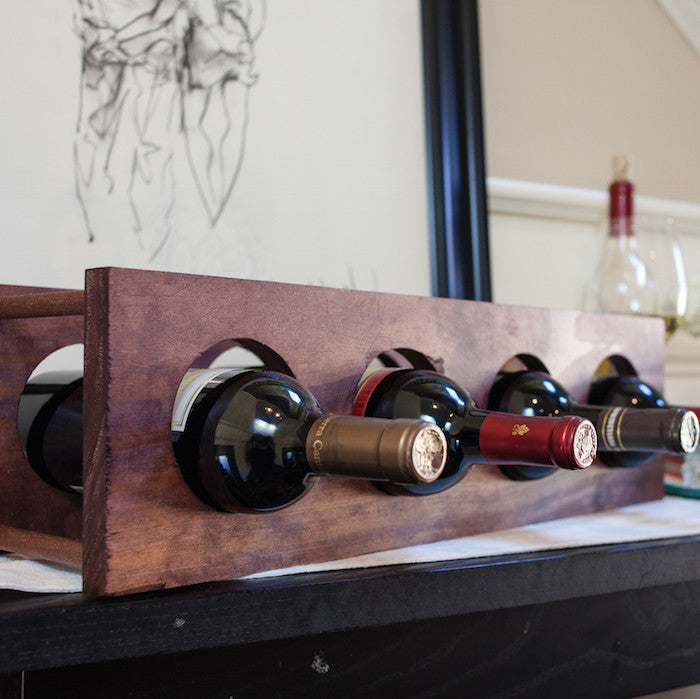
National DIY Day was yesterday (April 2) and we had a blast celebrating at events across the country. In prep for National DIY Day, we were inspired by so many do it yourself projects on the DIYZ app®. I like to think I am the hostess with the mostess and along with that comes having stylish and functional home décor for entertaining. My latest project is a DIY wine rack I created using the DIYZ app. Not only is this DIY wine rack beautiful and functional, but I was also able to build it in just a few easy steps using the segmented videos from the DIYZ app.
If you have been putting off home improvement projects or want to learn a new do-it-yourself skill, the DIYZ app is an absolute must download before National DIY Day. The best part is, you don’t have to leave the app to order materials and tools. If you need help or advice, you can chat with a licensed contractor with the tap of a finger via video-chat or phone. And, the DIYZ app has tons of cool projects for beginners and expert DIYers alike!

Time to start building my DIY wine rack!

Project Time: 2 Hours
Difficulty Level: Beginner
Materials:
- Miter Saw or Circular Saw
- Power Drill/Driver
- 1” x 6” x 4’ Pine
- ½” x 36” Oak Dowel
- Wood Glue
- 80 grit, 150 grit, 220 grit sandpaper
- 5” Hole Saw
- ½” Forstner Bit Danish
- Stain
- Stain Rags
- Eye Protection
- Ear Protection
- Dust Mask
Directions:
- Measure the board and make these straight cuts with your miter saw:
- 1” x 6” – 21 ½” x 2
- ½” Dowel – 5 ½” x 4
- For a stackable unit – ½” Dowel – 1 ½” x 4


- Mark 3 ¼” from one side and add 5” for each additional wine bottle hole. Then mark the middle of each hole. Using a drill or drill press, cut the 3 ½” holes into the wood with your hole saw.


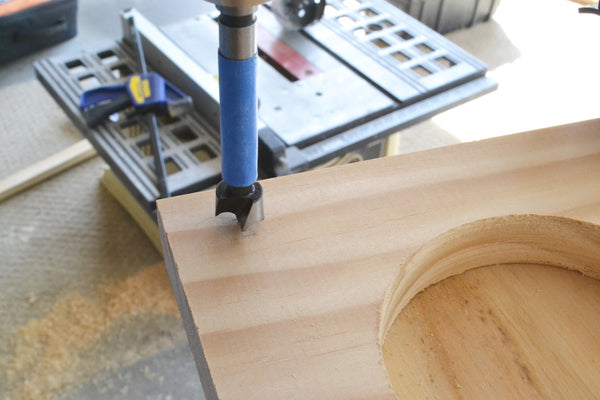
- Mark ¾” from each end and ½” from the top and bottom. Use tape on your ½” forstner bit to measure drill depth so you do not go through the other side of the wood. Drill through, making sure not to drill straight through.


- Sand all the pieces using 80 grit sand paper to smooth over all the imperfections. Then progress the sanding through 150 and 220 grit papers. Wipe clean after sanding with a cloth or rag.
- Stain or paint wood pieces and allow time to dry based on manufacturer’s instructions.

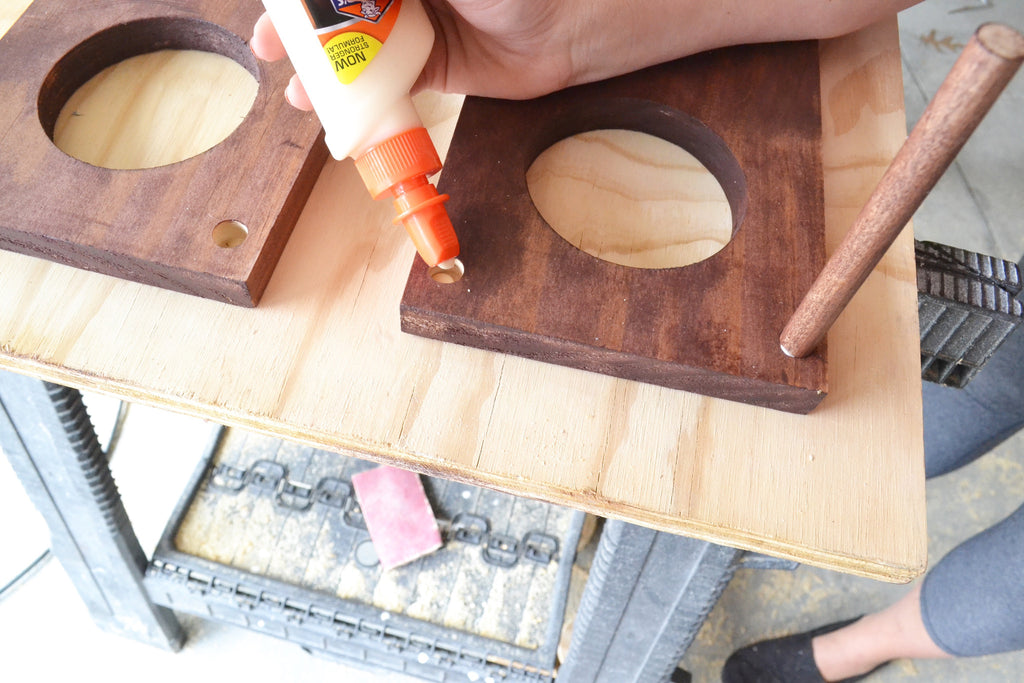
- Once dry, insert the dowel into the hole with the wood glue in each side. Do this with all your dowels to assemble the DIY wine rack.

- Allow the glue to set. If you are making stackable units, make sure to drill out an additional hole for the dowel on the bottom of your second unit. The holes should be 1 ½” from each side and centered in the wood.
Your DIY wine rack is now ready for a party! This is the perfect project to prep for all your spring get-togethers! I think this calls for a glass of wine!


Don’t forget, if you have any questions while building your DIY wine rack project or need advice, you can chat with a licensed contractor without leaving the app. With the tap of a finger, get answers via phone or video-chat.
Remember, National DIY Day is right around the corner on Sunday April 2. Download the DIYZ app now. It’s free from both the Apple App Store for iPhone or Google Play for Android. Once downloaded you can get more project and DIY ideas to celebrate! Don’t forget to share your projects with us using the hashtag #NationalDIYDay
Connect with the DIYZ app: Facebook | Instagram | Twitter | Pinterest | Blog | #DIYZ #GetWise


