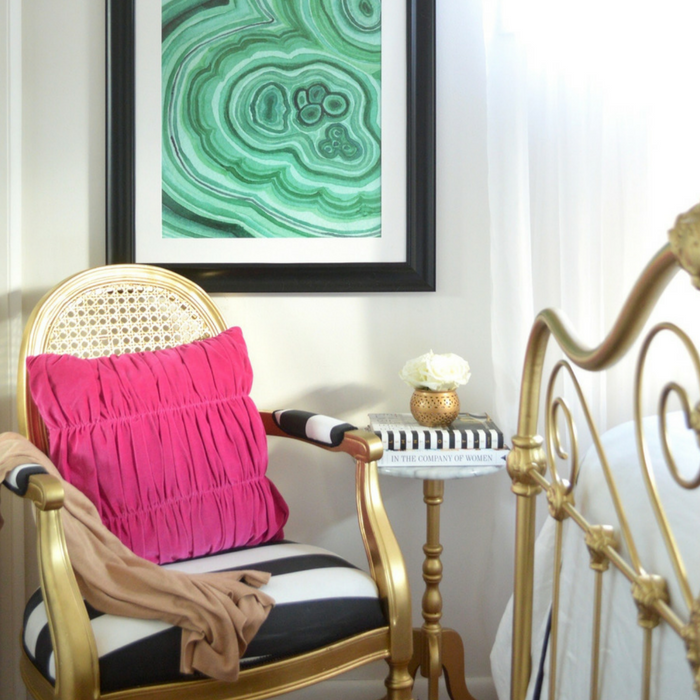
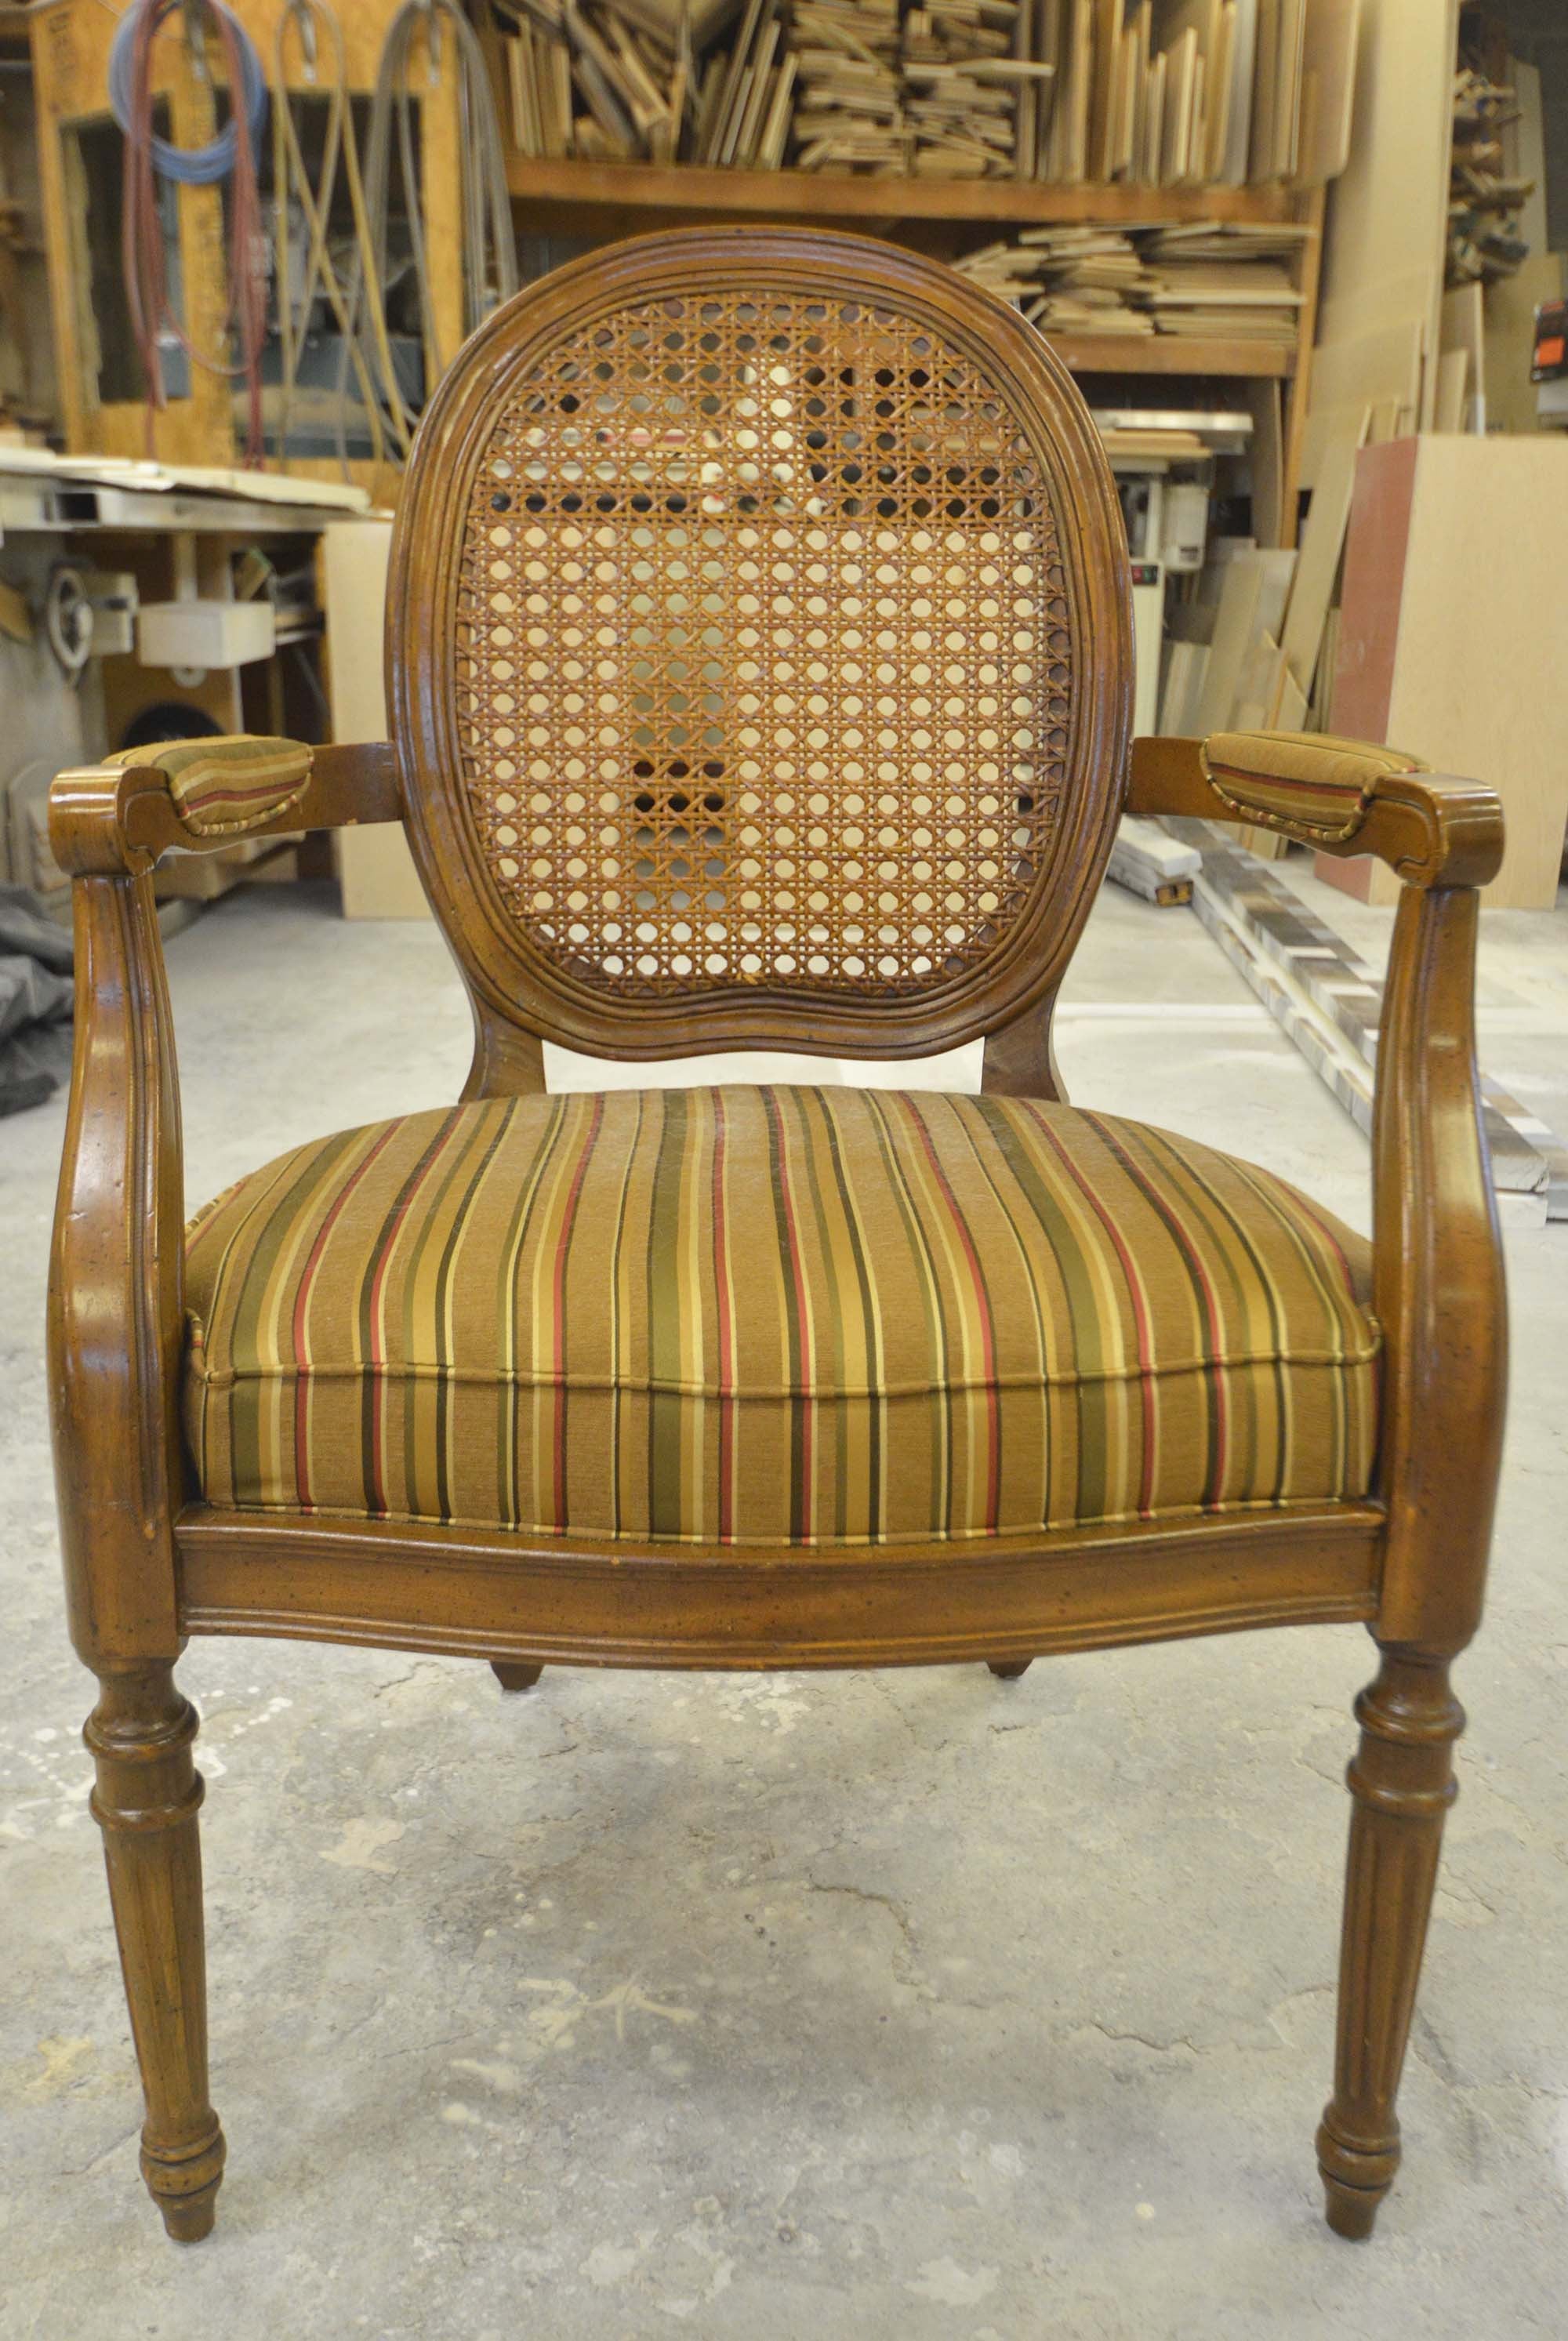
Anyone else have a home décor bucket list? Like most other home décor/thrift store junkies, mine is quite lengthy and one item that I hadn’t been able to check off was a King Louis chair. It seemed like every time I was lucky enough to find one, it was way out of my price range. That is until I stumbled upon this one at Peddler’s Mall. It was in great condition and the price was just right! However, it wasn’t exactly my style, but with some new fabric and a splash of gold spray paint, I turned this boring, drab chair into a beautiful modern glam cane chair.

Materials:
-Black and White Striped Fabric (1.5 yds)
-Rust-Oleum Metallic Gold Spray Paint (2 cans)
-Fine Grit Sand Paper
-Hot Glue Gun
-Scissors
-Nail Gun
-Razor Blade
Steps:
- First things first, I removed the cushion. I was able to remove mine simply by unscrewing it underneath.

- I decided to give the chair a little splash of paint, so I scuffed it up a bit using fine-grit sandpaper. Then, I taped off any areas that I didn’t want painted. I always use this tape when painting.

- As always, I used my favorite metallic gold spray paint from Rust-Oleum and for easy application I used this comfort grip spray accessory. I applied two light coats to prevent dripping.

- While waiting for the paint to dry, I removed the old fabric and then began covering the seat cushion by turning the seat upside down on the non-printed side of my fabric.


*Tip: When using a striped fabric like I did, be sure that your stripes are straight by lining up like points on either side of your seat. It was easiest for me to match the points of each corner.
- We stapled the fabric to the underside of the seat using a nail gun.
*Tip: It’s important to pull the fabric so that its smooth and tight, but make sure stripes stay straight.
- After the whole seat was covered and the fabric was secure, I cut off the excess fabric for a cleaner look.

- Once the paint dried, we began covering the arms of the chair. We secured the fabric by stapling it. To make sure that the trim would cover up the staples, I tried to keep the staples as close to the wood as possible and in a straight line.

- To remove the excess fabric, we used an extra sharp razor blade cutting off the fabric where it met the wood of the chair.

- I wasn’t able to get a picture of the next step because we both had our hands full. But, to hide the staples securing the fabric on the arms, we attached this decorative black trim using a hot glue gun. While we applied the hot glue to the arms, we left the seat cushion off in case the glue dripped.

- Finally, we hot glued the same trim around the base of the seat cushion and then screwed it back to the chair.


Isn’t it crazy what a huge difference some new fabric and paint can make? To see more bold and colorful DIY’s and home décor, visit my blog Sincerely, Sweetpea. And, feel free to join me on Facebook, Instagram, and Pinterest, I’d love to have ya!
About Kalyn:

Kalyn Abrams is the creator and voice behind Sincerely, Sweetpea- a blog dedicated to helping and inspiring women to create a colorful, classic, and one of a kind home on a college girl budget. She, her husband, and cat Baby currently live in a small, charming apartment in Cincinnati, Ohio that’s packed full of thrift store finds, DIY’s, and pops of pink. sincerelysweetpeablog.com