


This is a sponsored conversation written by me on behalf of Cricut. The opinions and text are all mine.
I am so excited that I can finally spill the beans about the awesome new system Cricut just released! IT IS AMAZING!!!! If you are a fan of Cricut you know they are a leader in the craft industry and always on the forefront of new technology and setting the bar high for crafting trends. The newest addition to the Cricut family is the Cricut Influsible Ink System. The system includes infusible ink markers/pens, infusible ink transfer sheets, and infusible ink compatible surfaces.
If you are like me I had never heard of infusible ink and was curious about all the hype! I am so thankful that I got the chance to test out of the product early and as soon as I made the first project I instantly understood all the hype and couldn't wait to make more projects! Infusible ink transfers to the service with the use of heat (EasyPress 2) and actually infuses with the surface eliminating cracking, peeling or stretching. The colors are vibrant and stay vibrant through washing and wear! This takes my projects to the next level with a fresh professional look that will last forever!
The Cricut Infusible Ink System officially launches at my favorite craft store, Michaels Stores on June 21, 2019. Find out all the details here! Michaels Stores is now the largest retail destination for all your Cricut supplies!


Tips/need to know about the new Infusible Ink System:
- Works with the Cricut Maker and Cricut Explore Air 2
- Need an EasyPress or EasyPress 2 (I recommend the 2 because it reaches 400 degrees)
- Need an EasyPress Mat
- Works best on Infusible Ink Compatible Surfaces (created by Cricut)
- Lint Roller is Recommended
- Butcher/Parchment Paper is Needed (Comes with the Infusible Ink Sheets but you will need extra for marker projects)
The Cricut Maker is the ideal machine to use with this system because of its versatility and capabilities. Is the most powerful of the Cricut cutting machines. As a reminder, it can not only cut vinyl, iron-on, infusible ink transfer sheets but also fabric, balsa wood, and leather!
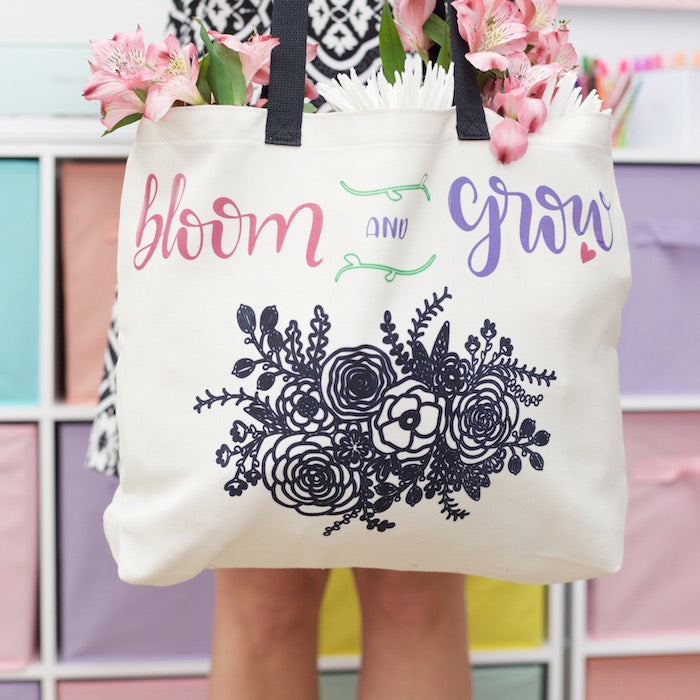
Project 1: Tote Bag Designed with Infusible Markers and Infusible Ink Sheets

Materials:
- Infusible Ink Markers
- Infusible Ink Transfer Sheets
- Infusible Ink Compatible Tote Bag
- Cricut Maker
- EasyPress 2
- EasyPress Mat
- Butcher Paper
- Standard Grip Cutting Mat
- Lint Roller
Directions:
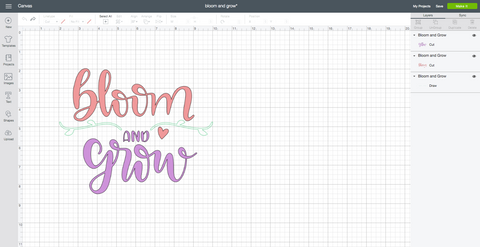
- Create the design in Cricut Design Space and determine which elements you want to cut out of the Infusible Ink Sheets and which you want to draw with the Infusible Ink Markers. I created a two-part design with the Words Bloom and Grow above a beautiful floral design.


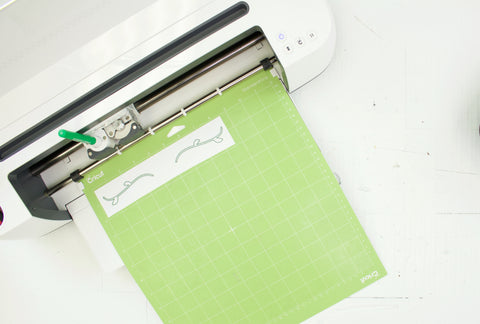
- For "Bloom And Grow" I cut it out of the purple and pink infusible ink sheet and drew the decorative leaf with the green Infusible Ink Marker. Remember to note in Design Space which elements you want to draw and which elements you want to cut so the machine prompts you to add the pen. Since you are ironing on the elements make sure you that you mirror the images. For the cutting, portion make sure to select the "Infusible Ink Transfer Sheet" as the material. The color side of the sheet should be facing up.

- The Maker will prompt you to switch mats and install the marker.


- Keep in mind I laid this out one way in design space and then decided I was going to display it differently once I had the full design on my bag so I cut apart the words to re-arrange.

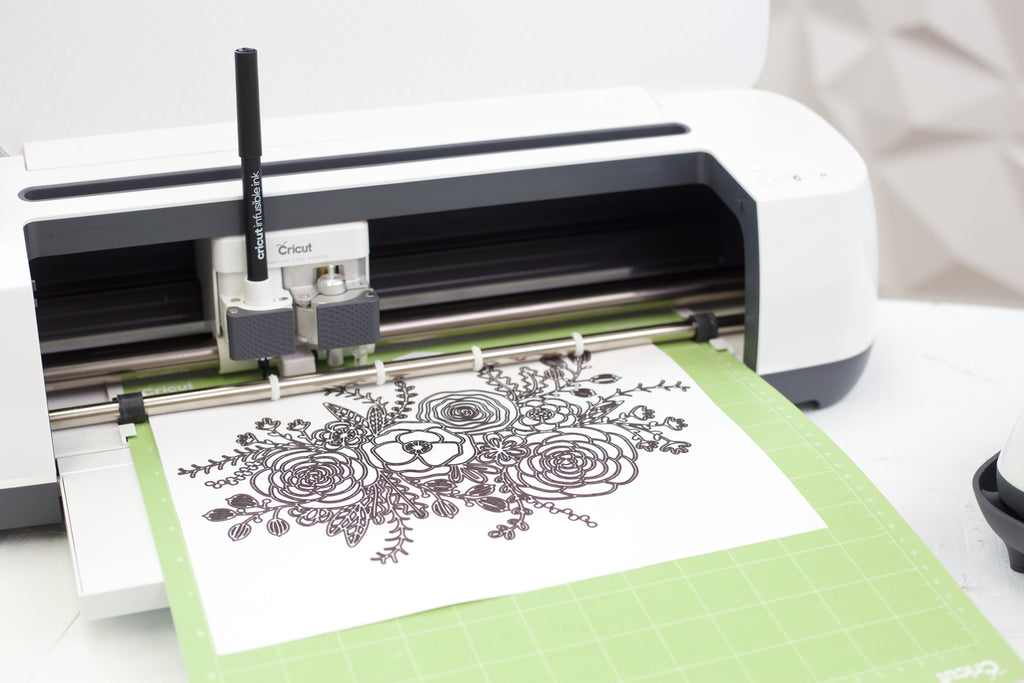
- The floral design was the second part of my design and you can find it here in Design Space. For this design, I decided to draw it with the Infusible Ink Marker. Keep in mind you can draw on standard copy paper.

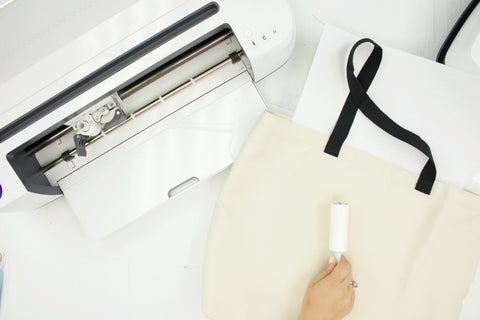
- Next lay the EasyPress Mat on your work surface. Cover with a sheet of butcher paper. Lay the tote bag on top of the butcher paper. Add a piece of cardstock in the tote bag.
- Next, use the lint roller to remove any excess lint on the tote bag. This step is super important because any stray fuzz or lint can alter your design.

- For the project, I used the EasyPress 2 set at 385 degrees. Always refer to the Cricut EasyPress Settings Guide.
- Pre-heat the surface for 15 seconds.
- Arranged the design on the tote bag and cover with butcher paper.
- Heat with the EasyPress 2 applying light pressure. Be sure to not move the Easy Press side to side. It is so important the design stays in place. For this project, I heated for 40 seconds. Refer to the Cricut Easy Press Setting Guide for your project. I did my project in sections to ensure that the sections did not move.

- Let the design cool before peeling the backing!
TADA!!! Isn't the design amazing! The reveal is the absolute best part!!! It is incredible to see how vibrant the colors are once they infuse with the fabric!

Project 2: T-shirt with Infusible Ink Patterned Transfer Sheets

Materials:
- Infusible Ink Transfer Sheet
- Cricut Maker
- EasyPress 2
- EasyPress Mat
- Infusible Ink T-shirt
- Butcher Paper (comes with transfer sheet)
- Standard Grip Cutting Mat
- Lint Roller
Directions:
- Create or select a design in Design Space. I used this Hello Beautiful design from design space.
- When you are ready to cut, select Infusible Ink Transfer Sheets as the material and mirror the image.
- Be sure to place the sheet pattern side up on the cutting matt.

- Weed the design to reveal the negative space. Keep in mind the weeding is different than vinyl, You want to make sure you start at the corner and use the weeding tool to pull up the corner and gently pull back.
- Place the EasyPress mat on your work surface and cover with a sheet of butcher paper.
- Place the t-shirt over the butcher paper and place a sheet of cardstock inside the t-shirt.
- Use the lint roller to remove any excess lint from the shirt. This step is extremely important.


- Cover the design with butcher paper. You need the butcher paper in between the EasyPress and the design.
- Heat the EasyPress 2 based on the recommended settings available on the Cricut EasyPress Setting Guide. For this project, I heated at 385 degrees for 40 seconds.

- Let the project cool before removing the backing.

TADA!!! I think this reveal was the most exciting because it looks so different from the sheet! The colors and the detail are so vivid.
Project 3: Coasters
The Infusible Ink Transfer Sheets and Markers/Pens work on the Cricut Ceramic Coaster Blanks!!!


Follow the instructions on the projects above for creating and printing/cutting your design.
Refer to the Cricut Easy Press Setting Guide for the heat settings and time.
Tip: Don't create a design that is too close to the edge because you need to make sure you can evenly heat the entire design.
I can't wait to see all you the exciting projects you create with this new system! Feel free to comment below or message me on Facebook with questions! Im happy to help!!!
Find out more details on Cricut.com
xoxo- Lynn
This post is sponsored by Cricut but all thoughts and opinions are my own!

Hi Alesa, these are shirts created by Cricut for the infusible ink. If you do not use one of those the shirt needs to be 100% polyester.