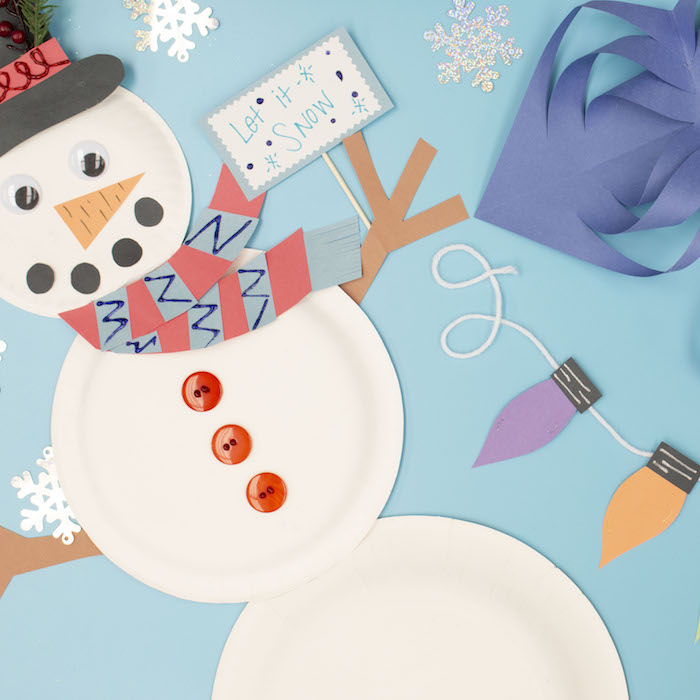
We are rocking and rolling through December! This year we are spending more time at home which means I need to get a little creative with activities and crafts to keep my 3-year old entertained. On my weekly Crayola broadcast this week I am sharing 3 easy crafts your kiddos can make at home! These are great for all ages!

Remember to tune in every Tuesday at 1:00pm EST on the Crayola FB Page!
You can purchase all the Crayola supplies used on Crayola.com
Project 1: Construction Paper Christmas Light Garland

Materials:
- Crayola Construction Paper
- Crayola Washable Liquid Glue and Glue Stick
- Crayola Glitter Pens
- Yarn
- Scissors
- Pencil
Directions:
- Cut out tear drop shapes from a variety of construction paper colors. Make them all the same size.
- Cut rectangles out of black construction papers. These will fit on the end of the lights as the light socket.
- Glue the black rectangles to the lights.
- Use the silver glitter pen to add accents to the black light socket.
- Use the other glitter pens to add glare marks to the light bulbs.
- Glue the lights to a strand of yarn leaving about 2 inches between each light.
Hang this on the wall or wrap them around the tree!
Project 2: Paper Plate Snowman

Materials:
- 1 Small Paper Plate
- 2 Standard Size Paper Plates
- Crayola Construction Paper
- Crayola Glitter Glue
- Crayola Washable Glue
- Crayola Markers
- Wood Skewer
- Craft Sticks
- Pencil
- Scissors
- Googley Eyes
Directions:
- Glue 1 small plate and 2 medium plates together with the bottom/white side facing up.
- If you want to create a sturdy snowman, glue craft sticks to the back of the snowman so he does not bend.
- Cut stick arms out of brown construction paper and glue the back of the middle plate so they stick out the side.
- Cut a hat from black construction paper. Decorating with a red piece of construction paper and scrap tree trimming. I also added some flair with the glitter glue.
- Glue 3 buttons to the center of plates.
- Cut a carrot nose from orange construction paper. Add lines with a black marker.
- Cut pieces of round coal from black construction paper for the snowman mouth.
- Glue the googley eyes, carrot nose and coal to the top small plate to create your snowman's face.
- Glue the hat on the top of the snowman head.
- Cut a rectangle sign out of blue and white paper. Write a fun message and decorate with glitter glue.
- Glue the sign to the skewer (you might need to trim the skewer).
- Glue the skewer to one of the snowman stick arms.
Now you have your very own frosty!
Project 3: 3D Paper Snowflake

Materials:
- Crayola Construction Paper
- Crayola Glue
- Scissors
- Pom Pom
- Yarn or String
Directions:
- You will need to start with 6 square pieces of construction paper. Make sure they are all the same size. The size of the squares will determine how big the final snowflake is.
- Fold each square corner to corner to make a triangle.
- Starting on the folded side cut slits, on the angle of the triangle being careful not go cut all the way through. Separate the slits about 1" apart.
- Unfold the square. Take the opposite corners bring them to the center and glue in place. The fold line should be vertical.
- Make 6 of these.
- Glue all pieces together at the point to form a snowflake.
- Finish the center by gluing a pom pom over the points.
- Glue string or yarn to hang.
How cute would these look to hang in your windows!
Next Tuesday at 1:00pm EST is my last live broadcast of year on the Crayola Page. I will be off for the holidays in January on maternity leave but I will be back in February with more fun crafts!
xoxo-Lynn


