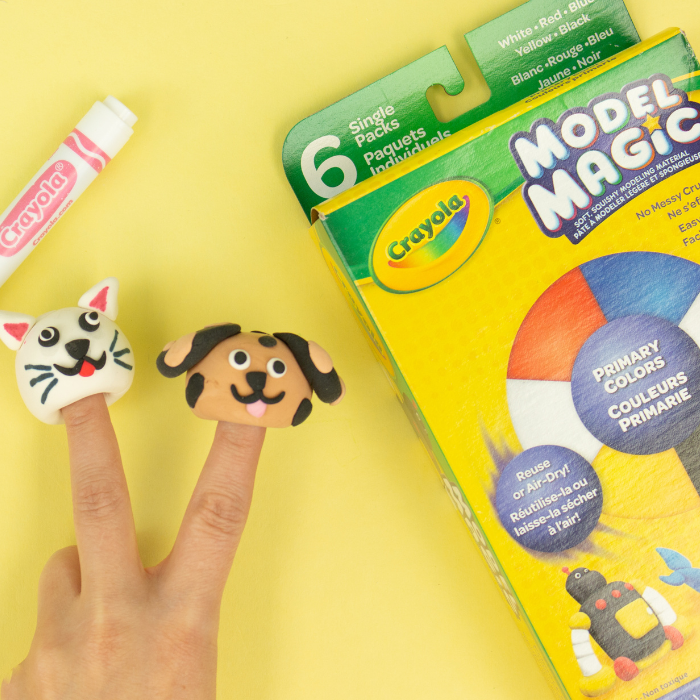
Project Name: Animal - Insect Week: Model Magic Dog and Cat Finger Puppets
Difficulty Level: Easy
Supplies from Kit:
- Crayola Model Magic
- Crayola Markers
- Crayola Scissors
Additional Supplies:
- Pencil

Project Video:
Directions for the CAT finger puppet:
- Use your scissors to open both packages of model magic. One is white and one is black.

-
Roll the white model magic into a ball and poke a hole through the bottom with your finger or an eraser pencil.

- Create 2 small triangles with the white model magic and attach to the top of the ball. These are the cat ears.


- Take your black model magic and create 2 small circles with even smaller white circles on top. These will be the eyes. Attach to the front of the ball.


- Create the nose and mouth with the black model magic as well.

- Make tiny tongue with red model magic or a red marker.
- Draw the whiskers and fill in the ears. with the markers.

Directions for the DOG finger puppet:
- Take your white Model Magic and color with a brown marker. Knead and roll until the Model Magic turns brown. You can color more if you want it to be a darker color.

- Roll into a ball and poke your finger in the bottom or use a pencil eraser to make a small indention.

- Take your black model magic and create two small ovals for the ears.


- Use some of your brown model magic that you just colored and create small polka-dots to go on the black ears.

- Attach the black ears to the top of your main brown ball.
- Create the eyes with white model magic small circles and smaller black circles. Attach to the front of the main brown ball.

- Create the nose and mouth with a small amount of black model magic.

- Color a small piece of white model magic light pink for the dog tongue. Attach under the nose and mouth.

I hope you enjoyed today's craft! Parent's don't forget if you share your child's projects on social media tag @craftboxkids @crayola and use #campcraftbox
Happy Crafting
Lynn


