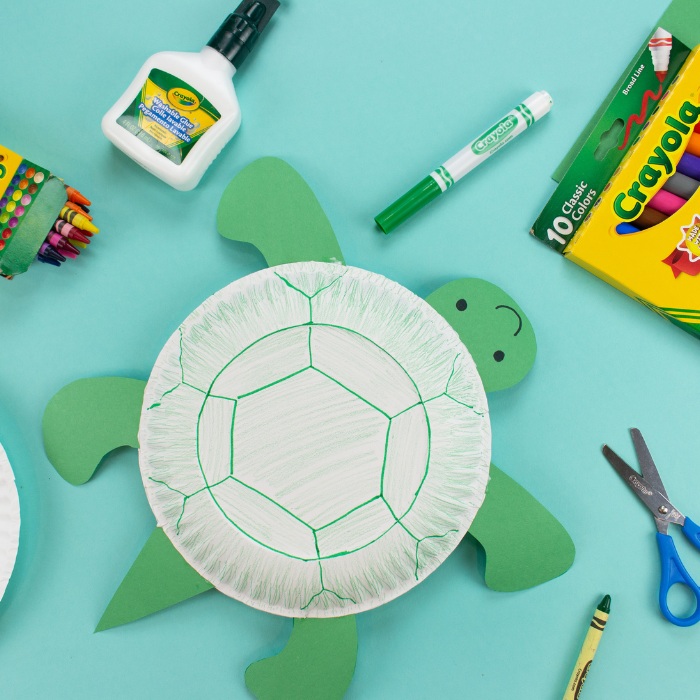
Project Name: Ocean Week - Paper Plate Turtle Shaker
Project Difficulty: Easy
Supplies from Kit:
- Green Construction Paper
- Crayola Markers
- Crayola Scissors
- Crayola Washable Glue
Additional Supplies:
- Dry Pasta, Rice or Beans
- 2 Paper Plates

Project Video:
Directions:
- Draw the turtle shell pattern on top of one paper plate with your markers and fill in with your green crayon.


- Place your paper plate on top of your green sheet of construction paper.

- Draw your turtle head, 2 legs, and a tail on the green sheet of construction paper. Trace the 2 legs to make a complete a se of 4 legs. Cut out with your scissors.


- Draw a face on your turtle head with your marker.

- Use your glue the legs, tail and head to the under side of your paper plate turtle back.

- Place some dry macaroni inside of your other paper plate put glue around the edge of the plate.

- Attach the paper plate with the turtle parts to the top of the other paper plate with macaroni. Let dry. Once dry shake and have some fun!

I hope you enjoyed today's craft! Parent's don't forget if you share your child's projects on social media tag @craftboxkids @crayola and use #campcraftbox
Happy Crafting
Lynn