This post is sponsored by Brother Crafts but all opinions and thoughts are my own!
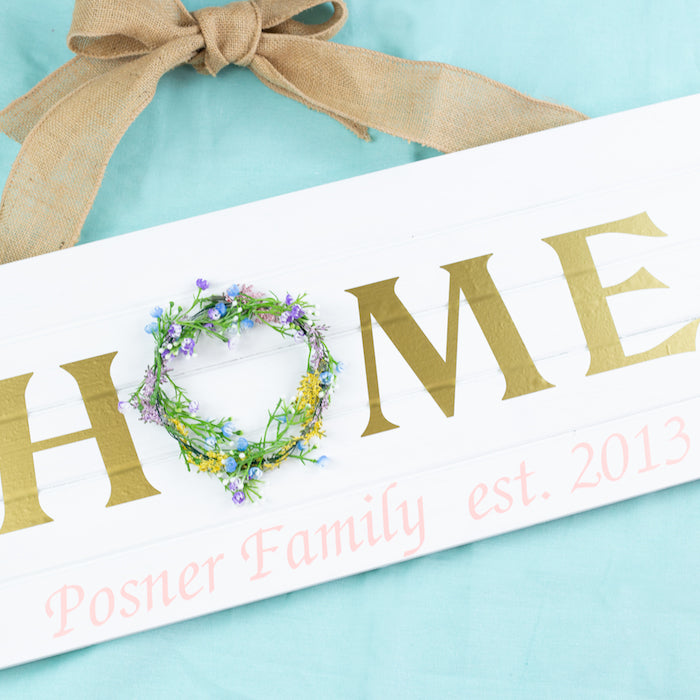
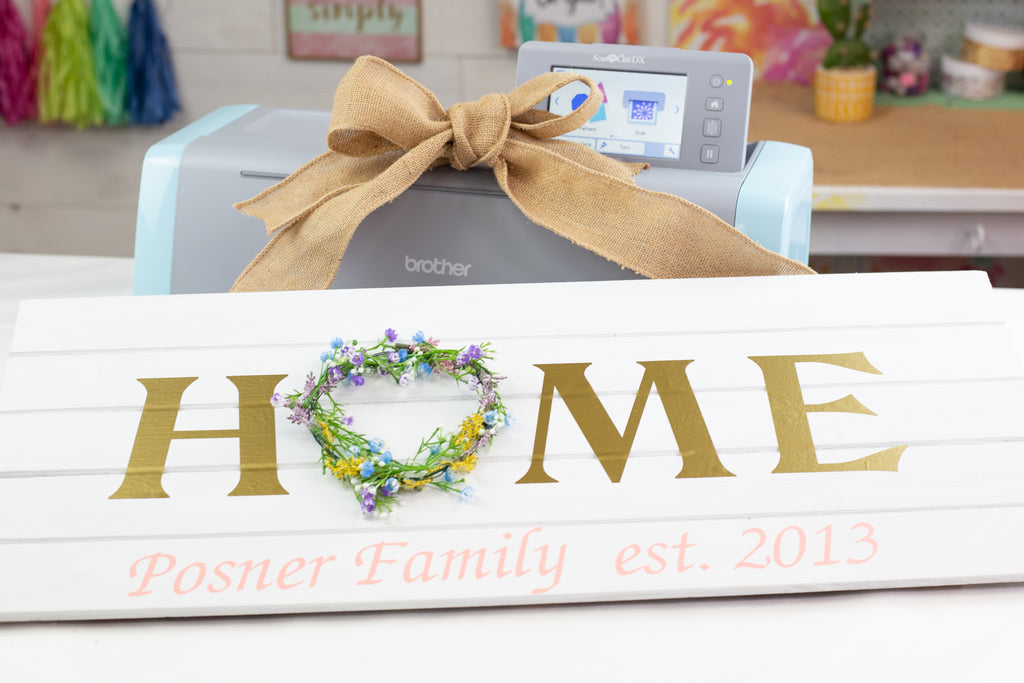
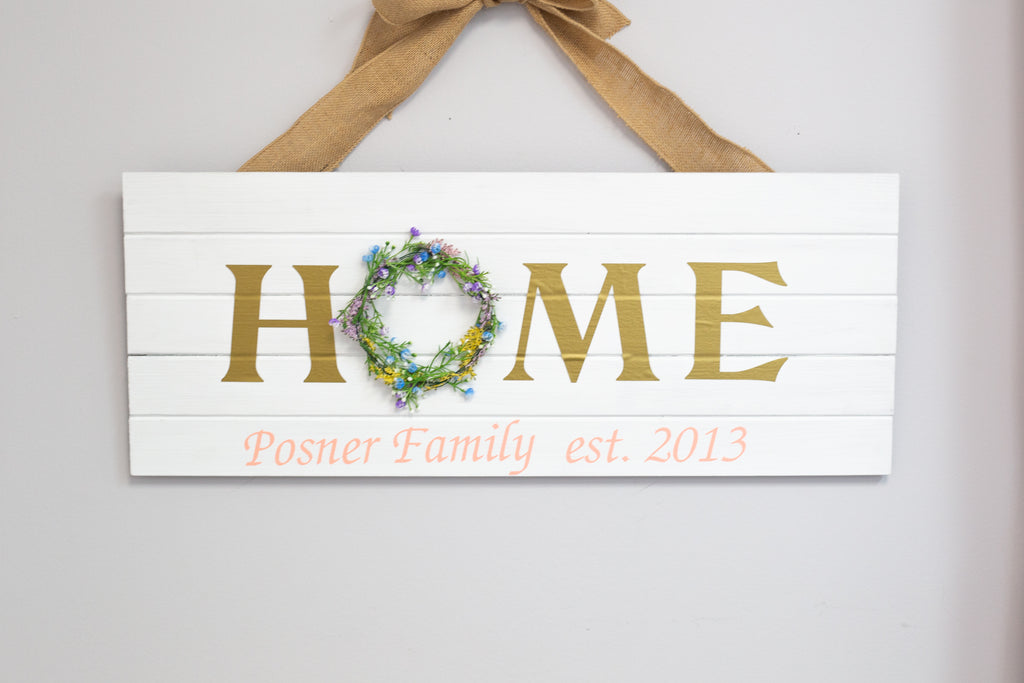
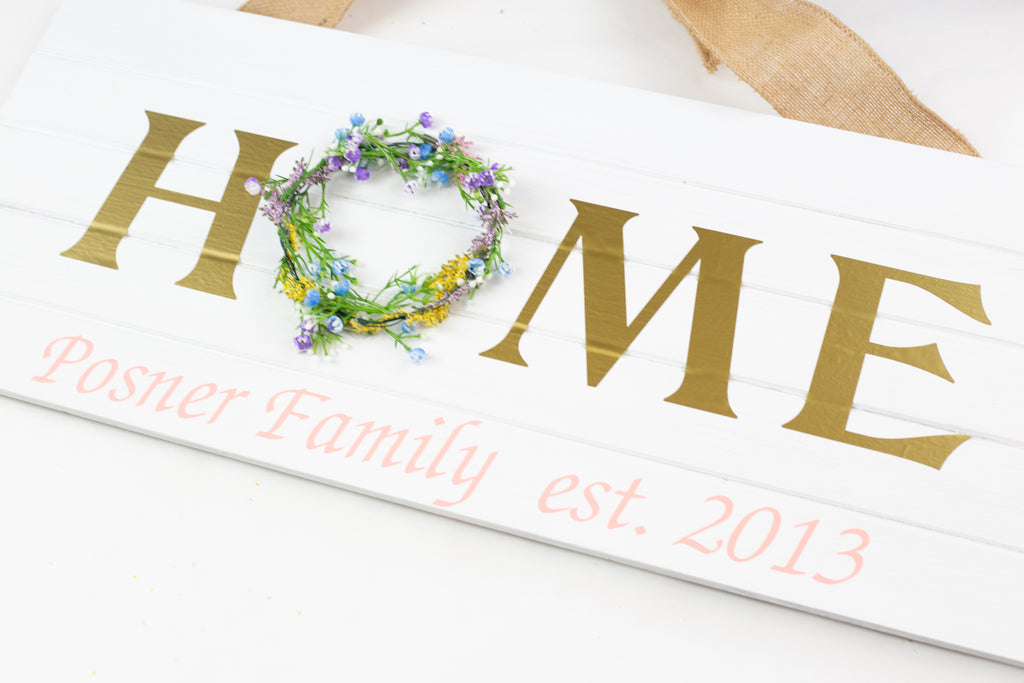
It is my goal in 2019 to add a more personalized touch to my home. I am kicking off this goal by making a do it yourself wood plaque home sign that has a farmhouse feel. This sign is simple but adds a perfect cozy touch. Make this sign in under 30 minutes using the Brother Crafts ScanNCut DX. Talk about a huge win!
All you need for this project is the Brother ScanNCut DX, a Low Tack or Standard Mat, Adhesive Vinyl, Transfer Tape, Wood Plaque, Floral Scraps, Floral Wire, Burlap Ribbon and Hot Glue.
Directions:
- Open a new project in CanvasWorkspace.
- I picked a simple font and typed out HME. I measured the plaque to determine the size of the letters. Remember to leave room for the O.

- Send the design file to the ScanNCut DX.

- Retrieve the file on the ScanNCut DX.

- Select Cut but make sure to set it on Half Cut. You can experiment with the level of Half Cut but I found that 3 works for my vinyl. The test feature is one of my favorite features of the ScanNCut DX. It allows you to cut a small triangle in the corner of the vinyl to make sure your cut settings are working properly. It definitely cuts down on mess ups and waste.

- Once the design is cut weed the excess vinyl around the design.

- Go back to CanvasWorkspace and open a new project. Type your family name and the year it was established. This can be the year you were married, had kids or started dating.

- Transfer design to the ScanNCut DX and cut using the same settings.
- Before cutting scan the mat so you can make sure the design is cutting on the vinyl.

- Once the cut is complete weed the excess vinyl around the design.
- Cut sections of transfer tape to cover the design. Adhere the transfer tape to the design.

- Use a scraper to rub and apply pressure over the transfer tape. This will help the design adhere to the transfer tape.

- Once the design has attached to the transfer tape place it on the board.

- Rub the scraper over the design applying pressure.

- Remove the transfer tape slowly by peeling back. If the design has not adhered to the plaque, place the transfer tape back down and continue to rub and apply pressure until it adheres. Do this for the rest of the letters and the family name.

- Form an O with a few layers of floral wire. Size the O to fit between the H and M on the board.

- Use the hot glue gun to add floral scraps the floral wire until it is fully covered.
- Glue the O to the board.

- Take the burlap ribbon and glue it to the back of the board and tie in a bow to finish the design.


I have already so many compliments from friends and requests for me to make them a sign!
Have you checked out my other craft projects using the ScanNCut DX? If not make sure to check out: Helicopter Dad T-shirt, Play Room Sign, Unicorn Card, and Flock Star Flamingo T-shirt.
xoxo LL