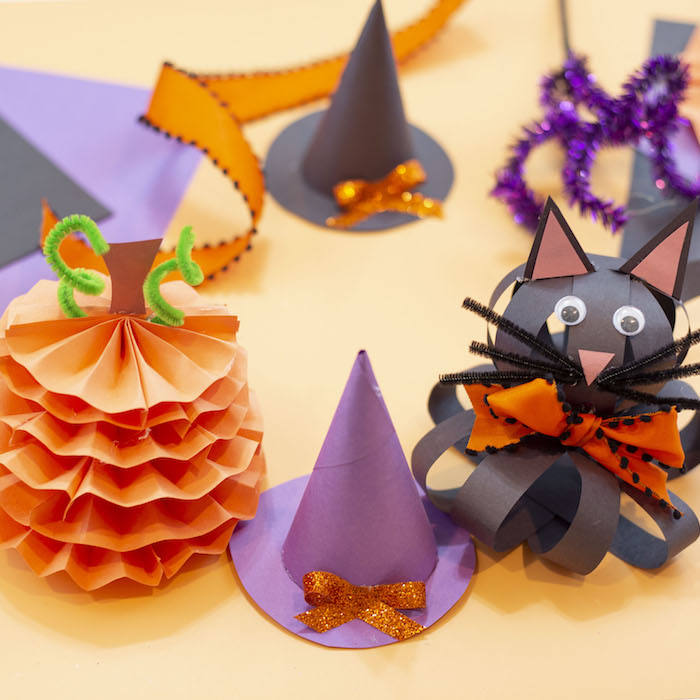
This week we are kicking off Halloween crafting fun on my weekly Crayola Facebook Live Broadcast! Grab a stack of construction paper, some glue and scissors and get ready to celebrate Halloween.
Shop all the Crayola products I used in the three projects below at Crayola.com.
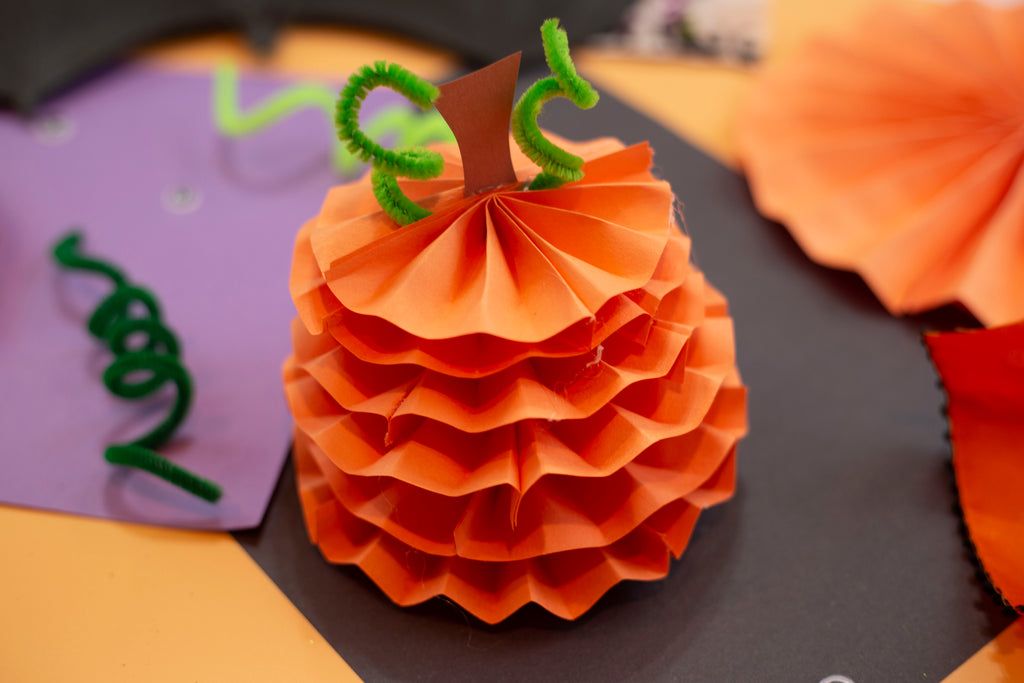
Project 1: Pinwheel Pumpkins

Materials:
- Crayola Orange, Black, Brown Construction Paper
- Crayola Glue
- Scissors
- Green Pipe Cleaners
- Scissors
Directions: Flat Pinwheel Pumpkin
- Cut 2 equally sized squares of orange construction paper.
- Accordion fold each square of construction paper.
- Fold each accordion in half and glue it together. Glue each half together to form the circular pinwheel.
- Cut a stem from brown construction paper and glue to the back of the pinwheel.
- Cut a face for the pumpkin out of black construction paper and glue on the pinwheel.
- Cut a green pipe cleaner in half. Curl each piece around your finger. Glue each curled piece to back of the pinwheel by the stem.

Directions: 3D Pinwheel Pumpkin
- Create pinwheels using the same method above. Create multiple sizes of pinwheels.
- Stack and glue the pinwheels starting with the largest on the bottom to the smallest.
- Cut a brown construction paper stem and glue it to the top.
- Curl small pieces of green pipe cleaners around your fingers.
- Glue these to the top.
Project 2: Bobble Black Cat

Materials:
- Crayola Black and Pink Construction Paper (9"x12")
- Crayola Glue
- Black Pipe Cleaners
- Googley Eyes
- Scissors
- Ribbon
Directions:
- Starting on the 9" side of the black construction paper. Cut four 1" strips.
- On a new sheet of black construction paper start on the 12" side and four 1" strips.
- Take one 12" strip and glue it in a circle. Take each of the other 12" strips and glue them around the circle until you get a sphere.
- Do the same thing withe 9" strips.
- Cut 2 black triangles and 2 pink triangles that fit in the black triangles and glue the together for your black cat ears.
- Glue the ears to the top of the 9" strip sphere.
- Cut a small pink triangle for the cats nose and glue point side down on the front of the 9" sphere.
- Cut 6 small pipe cleaners for whiskers and glue them around the nose.
- Add googley eyes to your cats face.
- Glue the two spheres together with the face sphere on the top.
- Cut a tail from the scraps of black paper and glue to the back of the bottom sphere.
A little spook a little cute!

Project 3: Surprise Treat Witches Hat

Materials:
- Crayola Black and Purple Construction Paper
- Crayola Glue
- Ribbon
- Scissor
- Candy/Trinkets
- Hat Template
Directions:
- Download, print and trace the template for the hat and brim.
- Roll and glue the hat.
- Fill the hat with small pieces of candy or trinkets.
- Glue the brim to the bottom.
- Tie a small bow with ribbon and glue it to the hat.
- Have fun breaking into the bottom of the hats to get the treats!

Happy Halloween!!!
Don't forget to tune in to my weekly live broadcast on the Crayola Facebook Page every Tuesday at 1:00pm EST.
xoxo- Lynn