Last weekend at the Craft & Hobby Mega Show I attending a great lettering workshop with Tombow. Today I am sharing with you the easy lettering technique I learned to create a fun party invitations and sign. First I will show you how to make an easy dessert table sign and second I will share how to make a homemade party invitation.
Materials for Party Sign:
- 8x10 Piece of Scrapbook Paper
- Tombow Dual Brush Markers
- 8x10 Frame
- Washi Tape
Instructions:
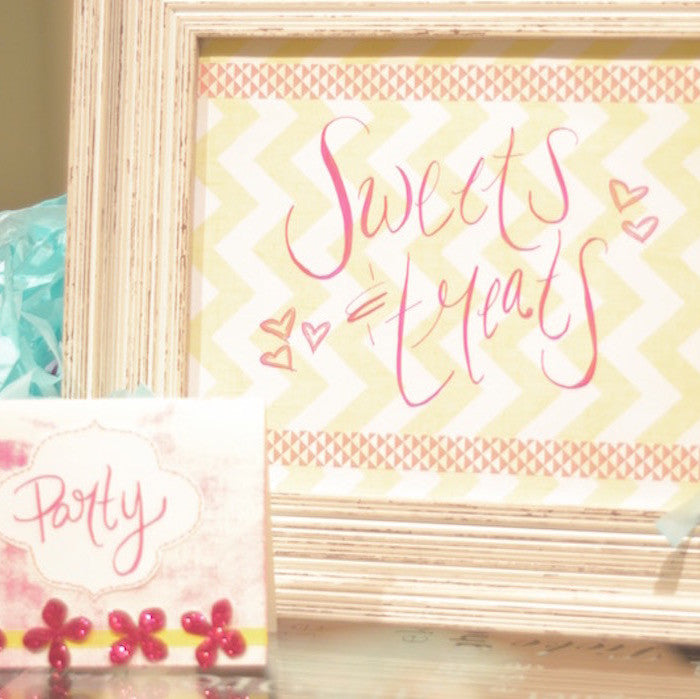
Using the thin side of a double sided marker write the words "Sweets & Treats" in relaxed handwriting on a piece of scrapbook paper. Bounce your letters to making the words look fun and festive. Think of an imaginary line and alternate the letters above and below that line. Also mix capital and lowercase styles.
Next thinken parts of the letters. To give a thick/thin look to the letters you will need to use the large brush side of your marker. Lightly trace the letter and when you are making a downward stroke press down to create a thicker line. Start to release pressure as you get to the end of the stroke. If the line is a little croaked you can just fill it in. These don't have to be perfect. 

Add washi tape across the top and bottom of the piece of paper.
Finish off by putting your sign in a frame. I like to leave the glass out of the frame. 
Materials for Party Invitation:
- Blank Note Card
- Glitter 3M Tape (I prefer this brand because the tape does not shed glitter)
- Martha Stewart Paper Punch
- Tombow Double Sided Marker
- Cardstock
- Washi Tape
- Glue Dots
- Piece of Plastic
Instructions:
- Color a big area on the piece of plastic with the large brush side of the marker.

- Rub the front of the notecard on the plastic to pick up the paint. This will give it a tie-dye appeal.
- Next draw and cut a shape out of the cardstock. Use the same technique as above to write the word "Party". I decorated the edges of the shape by dabbing dots with the thin side of markers.
- Add washi tape across the bottom of the card.
- Apply glitter tape to a piece of cardstock. Apply multiple strips based on the size of your punch.

-
Punch design out of the glitter tape.


- Secure the message and the glitter embellishments with glue dots.

Happy Partying!
xoxo- LL