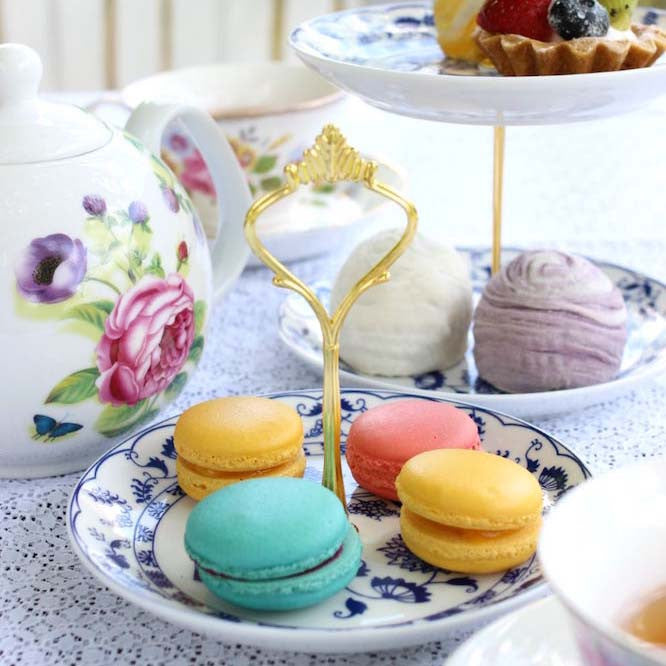
Every baby shower, wedding shower, tea party or any small girls' gathering I've been to has had a dessert corner of some kind. Whether it is a large spread with over 50 variety of desserts or a modest corner with a few sweet bites, the presentation is always an eye catcher. Crafty girls do this best! You know who you are, #TheNewMartha. Entertaining with the perfect tableware especially dessert stands can be hard to find and expensive. But it is necessary to get the right look for your party. Luckily as DIY girls, we do whatever it takes.
I had a small tea party last week and I wanted to use that opportunity to do a DIY dessert stand just to show you how easy it is to customize your own stands. Forget the endless search for party stands at the bargain stores (not that it's a bad thing). Here are two types of stands that are so adorable, modern and easy to make. Just you wait and see!
Supplies
- 3 small porcelain plates
- diamond head drill bit (small)
- a handheld drill
- 2 sets of metal tier hardware screw-on
- water
- marker

The supplies are easy to find and very affordable. I purchased a small set of porcelain plates on clearance at a bargain home store for $5.00. That's the beauty of this DIY project, you decide if you want colorful, printed designs or clean white plates for this project. I picked out a charming blue and white floral design. The hardware can be purchased at any craft store or online craft supply site. I paid $5 for a set of 6 hardware. That means I can make up to 6 sets of dessert stands with this set. It's already a bargain to me. As for the drill bit, I borrowed it from a friend. Ask around before you buy one. Chances are, one of your guy friends, neighbor, or dad has it in his garage.
Directions
1 Take a marker and make a small dot in the center of the plate.
2 Spray water onto the plate.
3 At an 45 degree angle, start drilling into the marked spot. This might take a while to start a niche.
4 Once the niche is created, turn the drill straight down drilling into the plate. Apply minimal pressure. It will take about 1-3 minutes depending on how thick your plate is. Remember to keep adding water so the friction won't burn the drill bit.
5 Once the drill goes through the plate. You are done. Continue the same method with the other plates.
6 Screw on the hardware. Make a one, two or three-tier dessert stand.
With three plates, I made a 2-tier dessert stand and a 1-tier plate. My girlfriends thought the one tier plate was so darling. We had a tea party in the backyard with my new DIY dessert stands. You can easily do the same.
For more DIY projects, check out Chan's Blog, Sweets By Chan!
For more DIY projects, check out Chan's Blog, Sweets By Chan!
Enjoy
Chan


