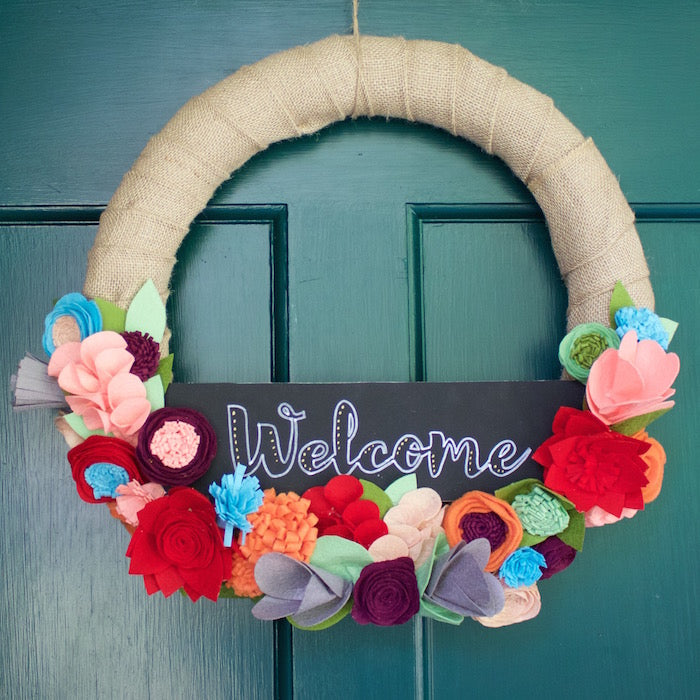
As a Michaels Maker, I get to create fun projects every month with my favorite craft supplies. It is no secret that I have a major crush on felt and an even bigger crush on felt flowers. This month I created a DIY felt flower wreath and I am sharing a few different techniques for making flowers! I made this wreath earlier on Michaels facebook page, you can watch the replay below or keep scrolling for the step by step instructions.
Supplies (all supplies available at Michaels Stores or online):
- Wreath Form
- Flower Templates (Download the templates for Free- Keep in mind that I hand drew and hand cut these. You can also use a cutting machine)
- Hot Glue Gun & Glue
- Felt (I used the Cricut Felt Sampler Pack)
- Scissors
- Burlap Garland
- Elmers Chalkboard Foam Board
- Pins
- Sidewalk Chalk & a Chalk Marker
Directions:
- Wrap wreath form with burlap garland and secure with hot glue.

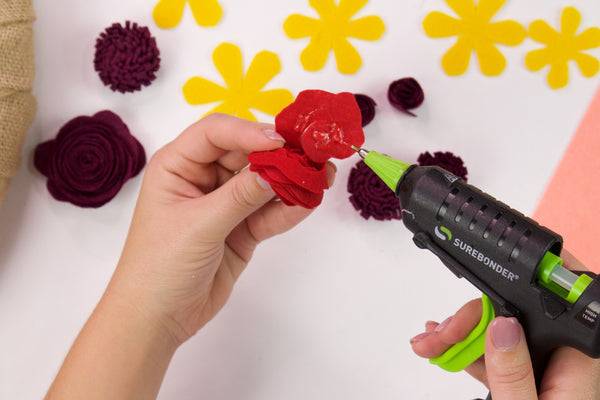
- Let's make the flowers! Note that the names listed below correspond with the downloadable template.
- Flower A: Spiral Flower
- Cut a spiral from the felt. You can freehand or use the template provided.


- Start rolling the flower from the end you started cutting.

- Tightly roll until you get to the end tab.
- Add glue to the tab and secure to the bottom of the flower.

- Flower B: Pixie Flower
- If you are using the template, note you will cut where there are solid lines and fold on the dotted lines.
- Cut the strip of felt, fold and cut slits starting on the fold, but be careful to not cut all the way through.

- Roll flower and secure with glue.

- Flower A + B
- Make Flower B, and cut Cut Flower A but do not make it.
- Wrap Flower A around Flower B and secure with glue.


- Flower C
- Using the template, trace and cut 8 circles. You can add petals and alter the size to fit your design.
- Apply a line of hot glue half the diameter of each flower and fold inward following the dashed line.
- Cut the base for Flower C and glue the petals on the base. Trim base as needed.
- If you would like to add leaves you can use one of the included templates.

- Flower D
- Trace and cut 4 petals using the template on your choice of felt. Cut two green leaves using the same template.
- Apply a line of hot glue from the point up about 1/2 inch and cinch the first petal.
- Do the same for each additional petal and stack and secure with glue as you go.
- Finish the flower by gluing 2 leaves around the base.

- Flower E
- Trace and cut 12 petals using the template. Note you will cut the slit in each petal (marked on the template)
- Cut one circle from Flower C to use as the base.
- Take each petal and overlap the flaps and secure with hot glue..
- Glue in layers on to the base.
- Finish the center with a smaller version of Flower A or Flower B.
- Flower G
- Trace and cut 5 Flower G petals and 2 leaves from Flower D.
- Place a line of glue from the tab of the petal about 1/2 inch up and cinch.
- Take each additional petal, apply glue and cinch around the previous petal to layer them.
- Finish the flower by gluing 2 leaves around the base.

- I like to create one of each flower to start and then positioning them on my wreath to determine which ones I should make doubles of and what colors work best. Use a pin to pin them to the wreath so you have the freedom to move them as you build your design. It really is like designing a flower bouquet.
- Next cut a piece of the chalkboard foam board to fit the length of the wreath. Determine where you want to position it as you building your design with your flowers.
- You can download my template for Welcome here. Trace this on the board by covering the back of the paper with sidewalk chalk, making sure to fully cover the area with the word. Place chalk side down on the chalkboard and use a dull pencil to apply pressure and trace. The chalk with transfer to the board. Trace transfer marks with a chalk marker.
- Once you have your design finalized remove the pins and secure the flowers and chalkboard with hot glue.


Note if your front door is directly in the sun use an alternative glue like Beacon Felt Glue as it will hold up to the heat.


I hope you love this wreath as much as I do!
xoxo- LL
This post is part of my partnership with Michaels Stores. Even though it is sponsored all ideas, photos, thoughts, and opinions are my own!

Hi, there!
We’re Craft Happy, a local event team hoping to bring creative talent (such as yourself!) to apartment communities in the metro Atlanta area. We absolutely LOVE your blog and were curious if you’ve ever considered teaching an art-inspired class. We think your unique skill would be a great match for our residents.
Ideally, these classes are 60-90 minutes with around 15-30 people in attendance on a weeknight. We would take care of the promotion and coordination with the apartment community, so you would just bring supplies and yourself! It’s a great way to introduce yourself and your services to a new audience, while the residents get the benefit of learning a new skill & taking a little piece of the evening home with them.
Let us know if this sparks your curiosity!
Happy crafting,
dana & kristin
co-founders
IG @crafthappyco
crafthappyco.com