This post is sponsored by Brother P-touch Embellish but all thoughts and opinions are my own.
Happy National Craft Month! I am continuing my celebrations with my partnership with Brother P-touch Embellish ELITE with another fun and easy personalized craft project!
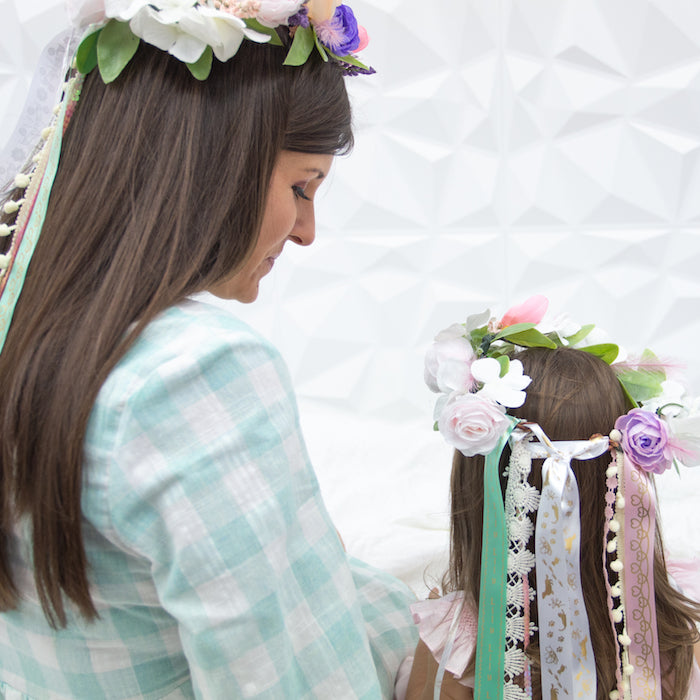
If you have been following me for a while you know my little sidekick aka my 2-year old daughter Lily! The older she gets the more she loves to craft and hang out with me at the studio. She also is very into dress up and fun accessories. She is clearly my child. I knew she would love to have mommy and me flower crowns! Instead of just making standard flower crowns I wanted to make personalized ones that could be a keepsake. I love how the P-touch Embellish ELITE turns a great craft into a keepsake in minutes! The ability to print on 0.94" size satin ribbon and tape is a game-changer.

Supplies:
- Brother P-touch Embellish ELITE
- Brother P-touch Embellish 0.94" Gold Print on Pink Satin Ribbon
- Brother P-touch Embellish 0.94” Gold Print on Mint Green Satin Ribbon
- Brother P-touch Embellish 0.94” Gold Print on White Satin Ribbon
- Sequin, Pom Pom and Decorative Trim
- Floral Wire
- Floral Tape
- An assortment of Faux Flowers and Greenery
- Floral Clippers
- Scissors
- Glue

Directions:
1. Cut and bend the wire into a circle. Cut a piece large enough to fit your head and your child's head. You will duplicate all steps below for both flower crowns.
2. Fold the ends of the wire into a loop.

3. Using the floral tape attach wrap and secure sections of the greenery around the wire until entire crown is covered.

4. Use the floral tape and wrap and secure individual flowers around the crown. Fill in until you get the desired fullness.


5. Open the Brother P-touch Design&Print App on a mobile device or a desktop computer.
6. Insert the white with gold satin ribbon cartridge.
7. From the home screen select pattern. For Lily's crown, I selected the doggy pattern and for mine, I selected the peacock pattern.

8. Select the ribbon color and the 0.94" width.
9. When ready to print each set the length for 36".


10. Next, switch to the mint green with gold satin ribbon cartridge.
11. From the home screen select pattern. Select the heart pattern, set the ribbon color and width to 0.94". Select the length of 15.7" and print.

12. Next, go back to the home screen. Select Ribbon. Select the repeating vertical design with a border.
13. I typed out Lily's name. You can type your desired message and select from one of the many fonts. Select the length of 15.7" and print.

14. Switch the cartridge to the pink satin ribbon. Edit the text to your name. I typed my name and printed another 15.7" ribbon.

15. Next, go back to the home screen, select pattern and select the heart pattern. Print a 15.7" length ribbon.

16. Attach the ribbons and trims to the ends of the flower crown and glue.

17. Take the white patterned satin ribbons and feed them through the wire loops at the end and tie a bow. TADA!


Lily and I had a blast modeling our flower crowns for a mommy and me photo shoot! You can replicate this project for weddings, showers, and festivals! The P-touch Embellish ELITE makes it so easy to customize in minutes and you can now easily purchase it on the new Brother online store! I love that we have this keepsake to remember our special mommy and me times!
xoxo- Lynn


