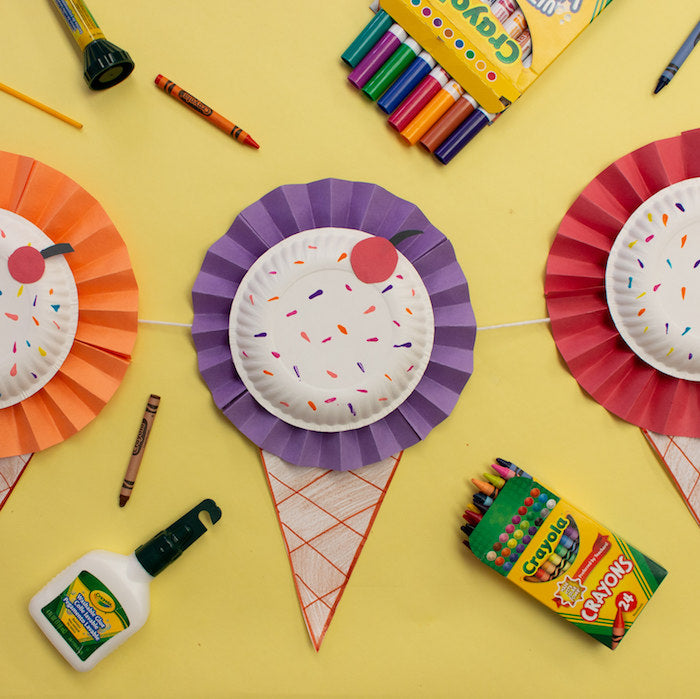
I scream..... you scream..... we all scream for ice cream and this fun banner craft! Here is what you need to make this craft:
Project Difficulty: Beginner
Materials:
- Construction Paper
- Washable Markers
- Crayons
- Washable Liquid Glue
- Paint Brush
- Glue Stick
- Washable Glue Set
- Scissors
- 1 Eraseable Colored Pencil
- White Paper from the Paint Set
Additional Materials:
- 3 Small Paper Plate
- Yarn
- Scissors
- Ruler

Directions:
- Put one of the paper plates face down on the table. Use the paint to paint small dashes to represent sprinkles all over the plate. Use multiple colors so you have rainbow sprinkles.

- Place the plate at the top of one of a white pieces of paper. Use the ruler to draw a triangle from the plate. This is the cone.

- Use a marker to outline and draw criss cross lines on the cone.

- Use a brown crayon to color the cone. Make two more cones for the other two paper plates.

- Make 2 more cones.
- Take 2 pieces of red construction paper.
- Fold one corner of the paper to the side. Crease the fold and cut off the edge. Unfold to reveal a square. Do this same step with the second piece of paper.


- Cut 3 small circles from the excess paper. These will be the cherries for the ice cream cones.

- Accordion fold each square.

- Fold each accordion in half to make a crease.

- Use the glue stick to apply glue to one side of the accordion half. Glue to the other to create half of the pinwheel.


- Do the same with the other accordion.

- Apply glue along the long side of one of the halves and glue to the other to form a pinwheel. Pinch together until dry.

- Use the liquid glue to glue the paper plate to the center of the pinwheel.


- Make two more pinwheels in the color of your choice and glue the plate to them.
- Glue the cone to the back of the pinwheel.
- Cut three small cherry stems from black construction paper.
- Glue the stem to each small red circle.

- Glue the cherry to each ice cream.

- Cut a piece of string or yarn long enough for all three cones and enough on each end to hang it up.
- Glue the string or yarn to the back of the cone.

I scream.... you scream... we all scream for this fun craft!!!


We hope you enjoyed this Camp Craft Box project! Parents, share your child’s craft on the Camp Craft Box Facebook Group. Don’t forget to tag @crayola and @craftboxgirls and use the hashtag #CampCraftBox if you share your child's projects on social media.


