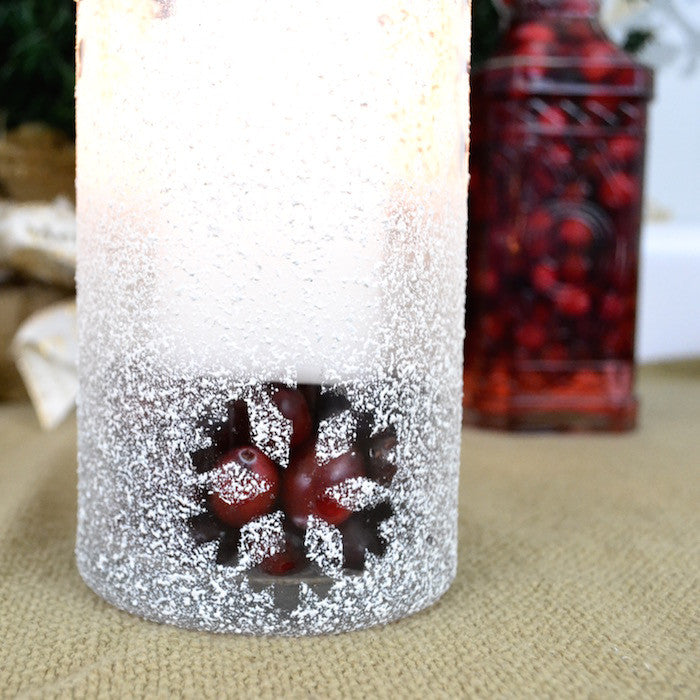
Happy Holidays! Merry and bright is my current mood as I am planning for Thanksgiving and multiple holiday festivities in December. As the holidays are nearing my days are filling up, leaving little time for making the perfect holiday decor. I love this snowflake candle holder because it is a 30 minute project and simple to replicate quickly for large tablescapes and gifts!

Materials:
- Glass Vase
- Paper Snowflakes
- Craft Bond
- Krylon Stone Coarse Texture in White Onyx (textured spray paint)
Directions:
- Create snowflakes on your computer and print on cardstock or draw snowflakes on a cardstock paper. Cut out snowflakes.
- Spray the back of the snowflakes with craft bond and let them sit for 1 minute. Allowing them to sit will lessen the adhesive nature so you can easily remove from the glass.
- Stick snowflakes sporadically on the outside of the vase. Press to make sure the snowflakes adhere to the glass.

- Outdoors or in a well ventilated area, place the vase open end down on a covered surface.
- Spray paint one coat. Wait 5-10 minutes and spray paint a second coat. You will immediately see the snow like texture.

- Wait 10 minutes and remove the snowflakes. If you have problems removing them use a tweezer to pull up the edges.
- Let the vase finish drying for 1 hour.


Tip: The vase pictured was purchased from a dollar store! Use the project as a candleholder or vase. To add color fill the bottom of the vase with cranberries.
xoxo- LL
