Today we are going to make your own lucky lady bug!
Project Name: Lady Bug Paper Plate
Project Difficulty: Easy
Project Materials:
- Paper plate
- Black and red construction paper
- Silver glitter glue
- Pencil
- Washable glue
- Scissors

Project Video:
Project Instructions:
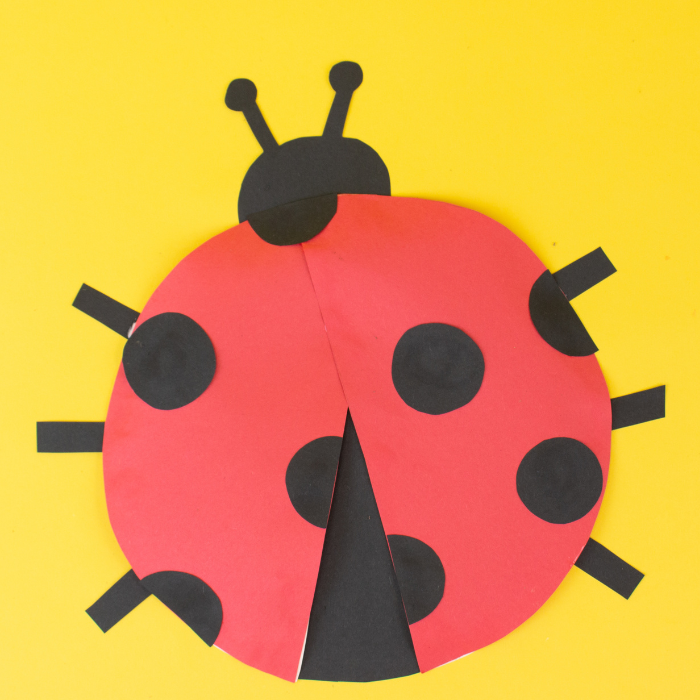
- Cut the paper plate in half.

- Trace the two pieces of plate on red construction paper. These will be the wings of the lady bug.


- Flip paper plate pieces over so the bottom is facing up. Glue the red construction paper to the plate pieces.


- Draw an oval on your black piece of paper and add your antennas to the top. Cut it out.
- Draw some circles on your black piece of paper. These will be your ladybug spots. These can be different sizes and that's okay!


- We are going to put our wings together now. Put a little bit of glue on the front at the top of one wing and overlap the top of the other wing. Press together and allow to dry.

- Glue the ladybug circles to your wings.

- Turn the wings over and place some glue on the bottom of the ladybug head. Place your ladybug head at the top of the wings.


- Take a little bit of leftover black paper and place the ladybug on top. Trace the opening in between your wings onto your sheet of paper (this will be a triangle shape). Now cut out.


- Apply glue to the sides and top of your triangle, flip your ladybug over to the back again and glue into the middle.


- Draw 6 ladybug legs on the black construction paper with your pencil. Cut out.

- Flip the ladybug over (white side up). Glue 3 legs to each side of the plate.


- Use glitter glue to make eyes on the head of the ladybug.

Now your have your very own lucky lady bug!!!