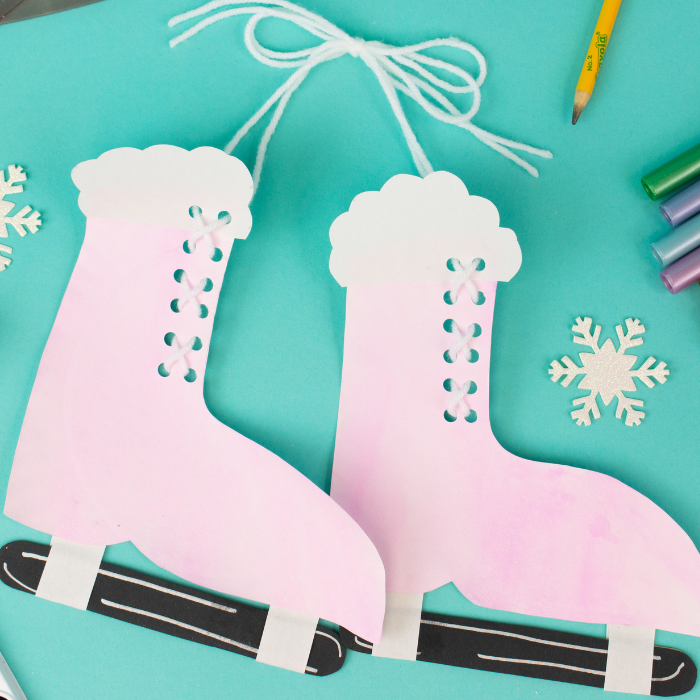
Project Name: Paper Plate Ice Skates
Project Difficulty: Intermediate
Project Materials:
- Black and white construction paper
- 2 Paper plates
- Scissors
- String
- 2 Popsicle sticks
- Hole punch
- Glue stick
- Pencil
- Paint brush and paint
- Metallic Markers

Project Instructions:
- Draw your ice skate shape on a paper plate and cut out.


- Using your watercolor and paint brush paint the skate and let dry. You can pick your favorite color.


- Trace the popsicle stick two times onto black paper. Cut out and glue to your popsicle stick.


- Use your metallic markers to decorate.


- Cut out two small strips from your white piece of paper.

- Fold each piece over top of your black popsicle stick - 1 on each end - glue with your glue stick.


- Place a white sheet of paper at the top of your skate and using your pencil, trace a cloud shape and cut out.


- Glue your cloud shape to the top of your ice skate using your glue stick.

- Glue the black popsicle stick to the bottom of your skates using your glue stick.


- Using your hole punch, cut out 12 holes along the side of the skate.

- Lace your string through the holes.


- Repeat the above steps for your other skate and attach the two strings together at the top by tying a bow.

Hang your ice skates up and image your own winter wonderland!