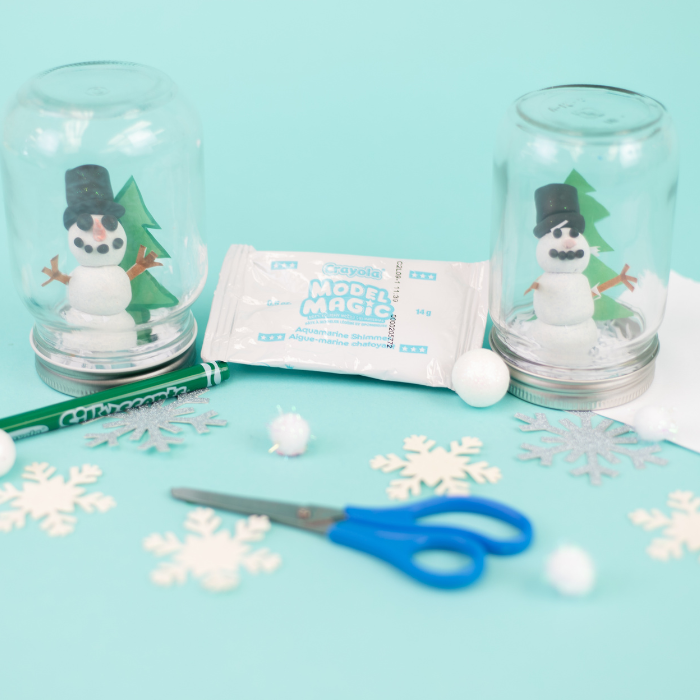
Today we are going to be making a snowman snow globe! this is a fun project o shake up some winter fun! you an get creative and add your own designs to your snow globe.
Project Name: Snowman Snow Globe
Project Difficulty: Easy
Project Materials:
- Green construction paper
- White paper from your marker and water color pad
- Aqua marine shimmer, white shimmer and black shimmer Model Magic
- Silly Scents markers
- Scissor
- Clean Plastic or Glass Jar (jelly jar, peanut butter jar, etc)

Project directions:
- First we are going to make our snowman with our shimmery model magic. Starting with white, separate your model magic into 3 parts.
- The first part will be a bit smaller for the snowman head. Roll this piece in between your hands until you have a round ball of clay.

- Next, take a slighter bigger piece of model magic and roll it into a ball just a bit bigger than the snowman head.

- The last ball will be the largest and will be the bottom of the snowman. Roll between your hands to make a ball just like the two previous balls.
- Slightly push those three balls together to form the snowman body.

- It's time to bring your snowman to life. Make small pieces for the eyes and the mouth.
- Take a small piece of model magic in black and roll a ball. Use your fingers to press into a square. Take another small piece, roll into a ball and flatten. Attach the flat piece to the square to make the hat.


- Add all three of the white model magic balls together with the smallest on the top. Add your two eyes and your 4 smaller black model magic pieces on for his mouth.

- Press the hat on the snowman.
- Create a nose out of your white model magic. Take a little piece and roll it in between your fingers until its a little pointy shape. Now we will take our silly scent marker and color it orange.


- Stick your nose on the face between the eyes and mouth.

- Take a white sheet of paper, draw your arms and color with a brown maker.


- Take the tip of your scissors to create a small indention onto each side of your snowman. Now stick your arms into the side of your snowman and press in the model magic around it to secure.


- Now our snowman needs something to stand on so we can see him once we put him in our jar. Open your aquamarine model magic and roll between your hands. Now flatten. This should be a circle shape.


- Take your green construction paper and draw a small tree. Now cut your tree out.


- Create a small indention in the back of your base and place your tree into the indention. Push the model magic back around the tree to secure it in place. Add your snowman to the front of the base.

- Unscrew the lid from your jar and place your snowman and base into the top of the jar.

- Take your white piece of paper and cut little tiny strips. This will be your snow for your snow globe. You can cut as much or as little as you'd like.


- Now place your little white pieces of paper into your jar.

- Without dumping out the snow that you just placed into your jar, take your jar and screw it onto your lid with your snowman. You now have a snow globe!

Enjoy your very own snowy winter wonderland!